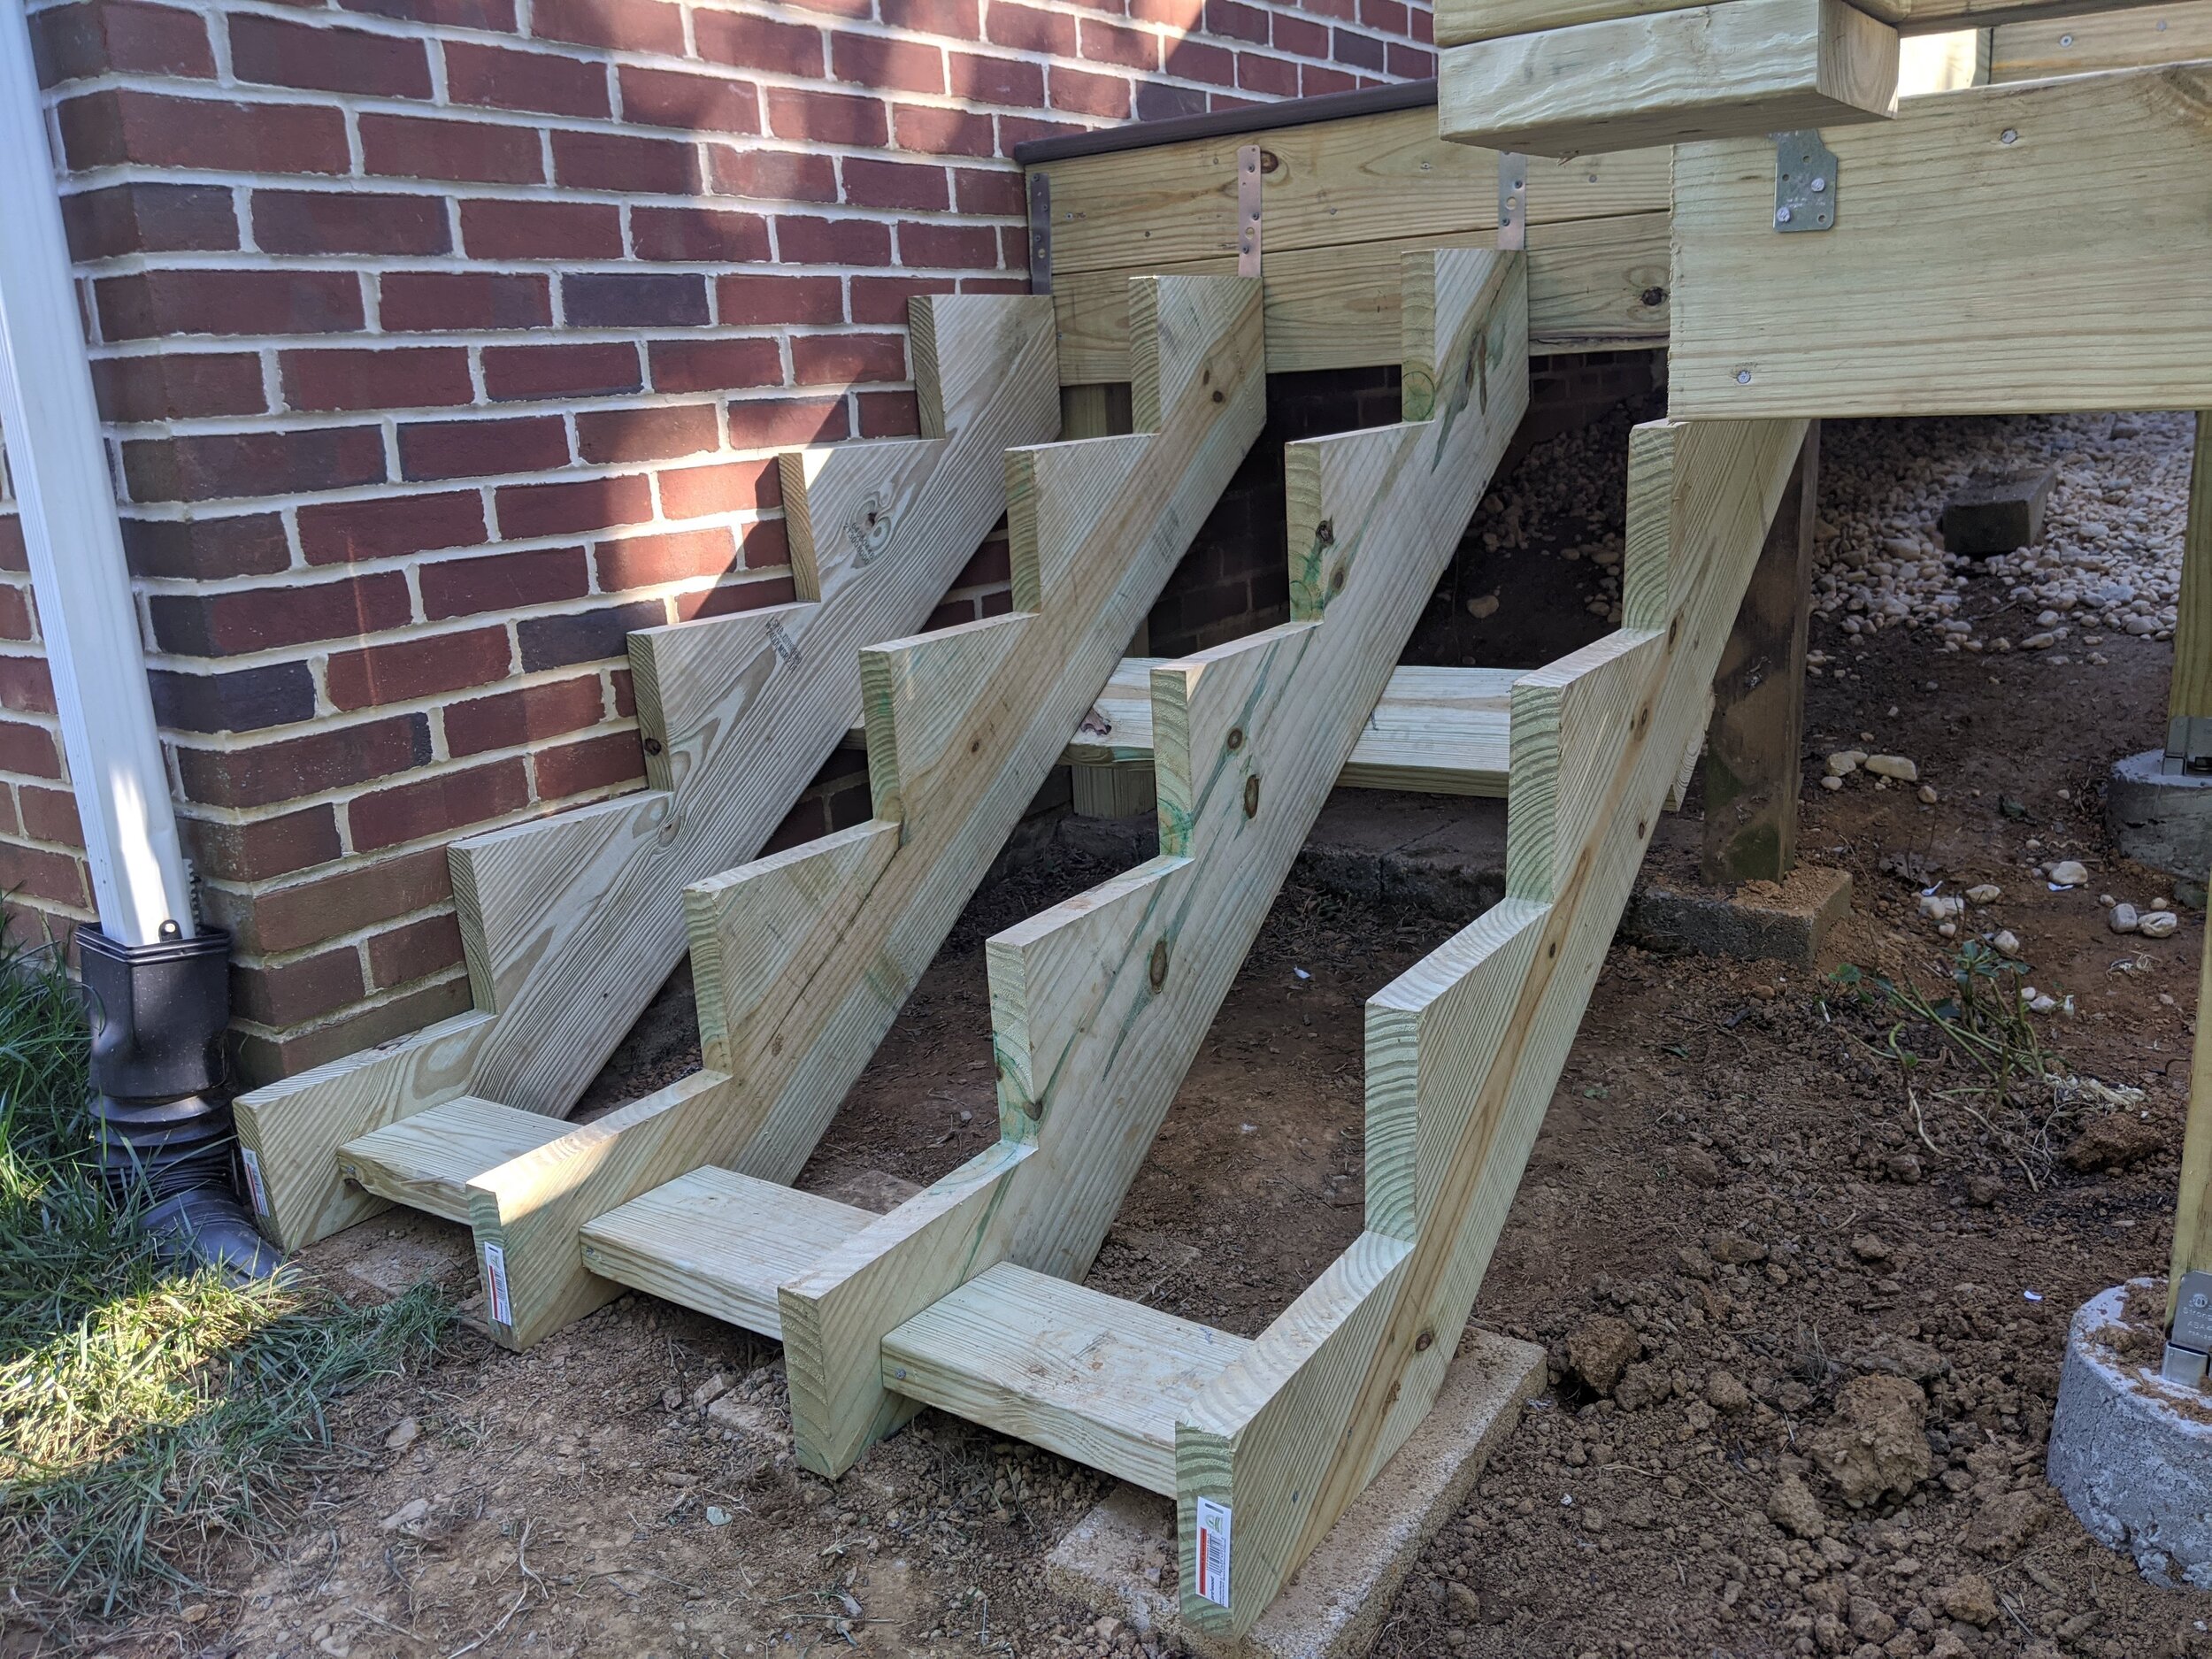
Old deck had 3’ wide stairs, and we wanted these wider. They are 4’ now. This was a multi-step process.
STAIRS
First, as you can see, we reinforced the area where the steps were going to hang. We also prepped the ground here to make sure the bottom was going to land where we wanted.
Next step was to hang the stair treads. Because we are using composite decking, we wanted to make sure they didn’t bow. That’s why they are four treads. Previously, we had four steps but now, there’s more of a drop because we moved everything four feet out. So we’re at five steps.
Hubs dug in concrete blocks to make sure the front didn’t dip over time, one under each tread. The cross pieces are used like the studs on the deck, to make sure nothing twists or slides side-to-side.
Then, we put joist tape on the skyward surfaces to make sure there was no rot from rainwater. Finally, we started putting on deck boards! We only put on the front at this time (so that no one was walking on the stair treads) and because these were a special kind of composite board with no groove in the side. (Different than what goes on the rest of the deck.)
Now…there is a LOT of trim/fascia work that got done on the stairs (plus the rest of the treads of course) but I’m putting that at a later step because we finished that up at the end.
RAILING PILLARS
Deck railing comes in 6’ sections, which means if you’re doing a deck that 6, 12, or 18 feet, you’re in luck! But if you’re doing any other size deck, you’re doing a lot of cutting. We had planned ahead of time what our pillar placement would be so we could build the space into the framing and footers. Everything worked out according to plan (that dirty fingerprint plan)!
This is from later in the process, but I wanted you to be able to see the ‘boxes’ we built around the pillars with framing wood so that when we screwed in, we had lots of layers to go through.
We are planning a Phase 2 that’s a pergola top for this, so four of the pillars are much taller than others because they will be supports for that.
These pillars are all going to get white composite sleeves over them, and one’s going to get electric. But for now, the important thing was to make sure they’re stable since they are the base for the railing. And if the railing doesn’t support you, it’s more of a hazard than anything else!
Make SURE you check the level on both vertical directions (N/S and E/W) before you screw these in. Your eye might not notice a single pillar is off a smidge, but you will for sure notice if the entire railing wants to lift off the ground because it’s leaning out.
In these pictures, the two close together are for the end of the deck rail and the top of the stair rail.
Stay tuned because next time, we’re finally putting down the actual deck boards!


