full-scale kitchen renovation

full-scale.png

I love our house, and the neighborhood is great, but the kitchen was silly. List of issues:

  • Very small

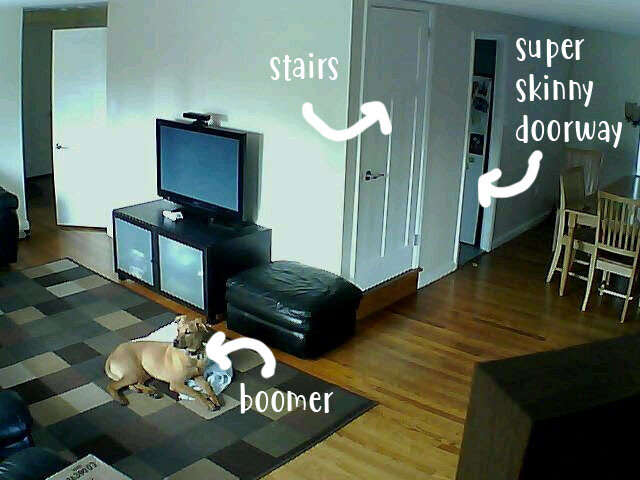
  • Closed off from everything (two EXTRAORDINARILY skinny doorways at opposite ends)

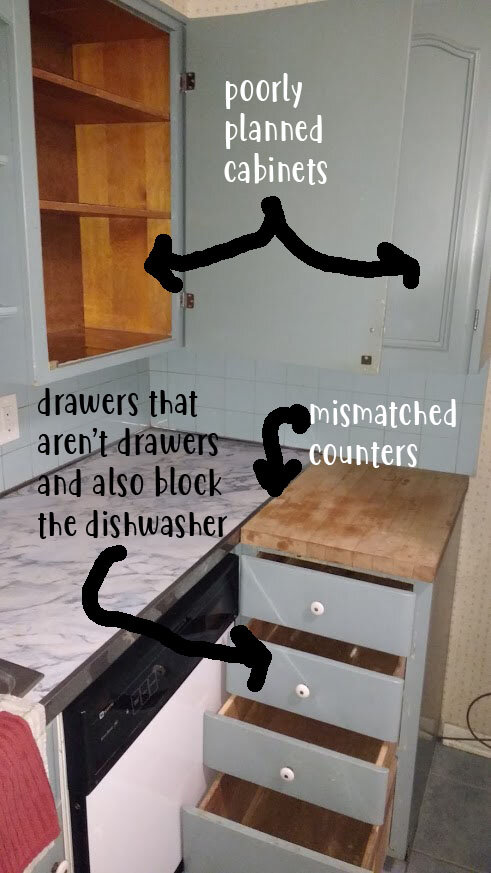
  • Nothing could open at the same time. The cabinets and drawers all smashed into each other, going the wrong ways.

  • Drawers weren’t actually drawers (with slides) so when you opened them, you had to hold the pull in your hand the whole time so it wouldn’t just fall out

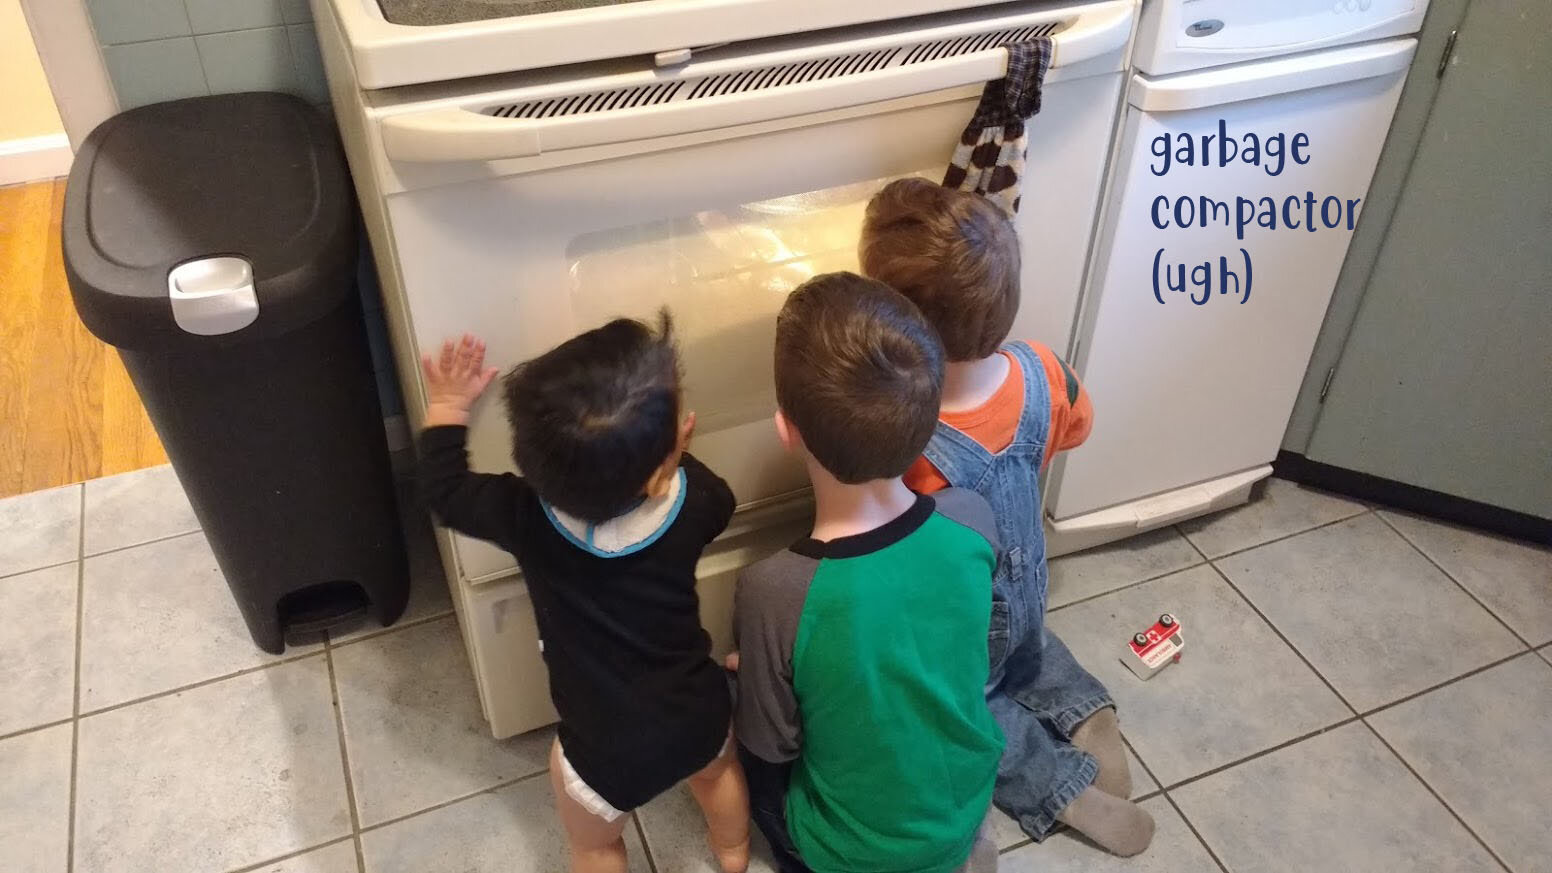
  • Garbage compactor was a huge waste of space

  • Old counters made of mismatching material, seamed together with long metal strips

  • Floor was randomly 1” taller than the rest of the house (CONSTANT TRIPPING)

  • Shallow pantry (appx 1 can deep and not a large can)

  • Weird mismatched walls like corkboard, tile, and wallpaper with lots of holes

When it came to planning a renovation, it’s important to know that the stairs are in the exact center of our home. So to the two dozen people who knocked and said “why don’t you take out this wall” — while knocking on our stairs…facepalm.

We actually did look into bumping out of the front of the house to add a few dozen square feet but that was cost prohibitive because that would change the foundation and there’s a hill. Generally not worth it. Certainly did not turn out to be needed!

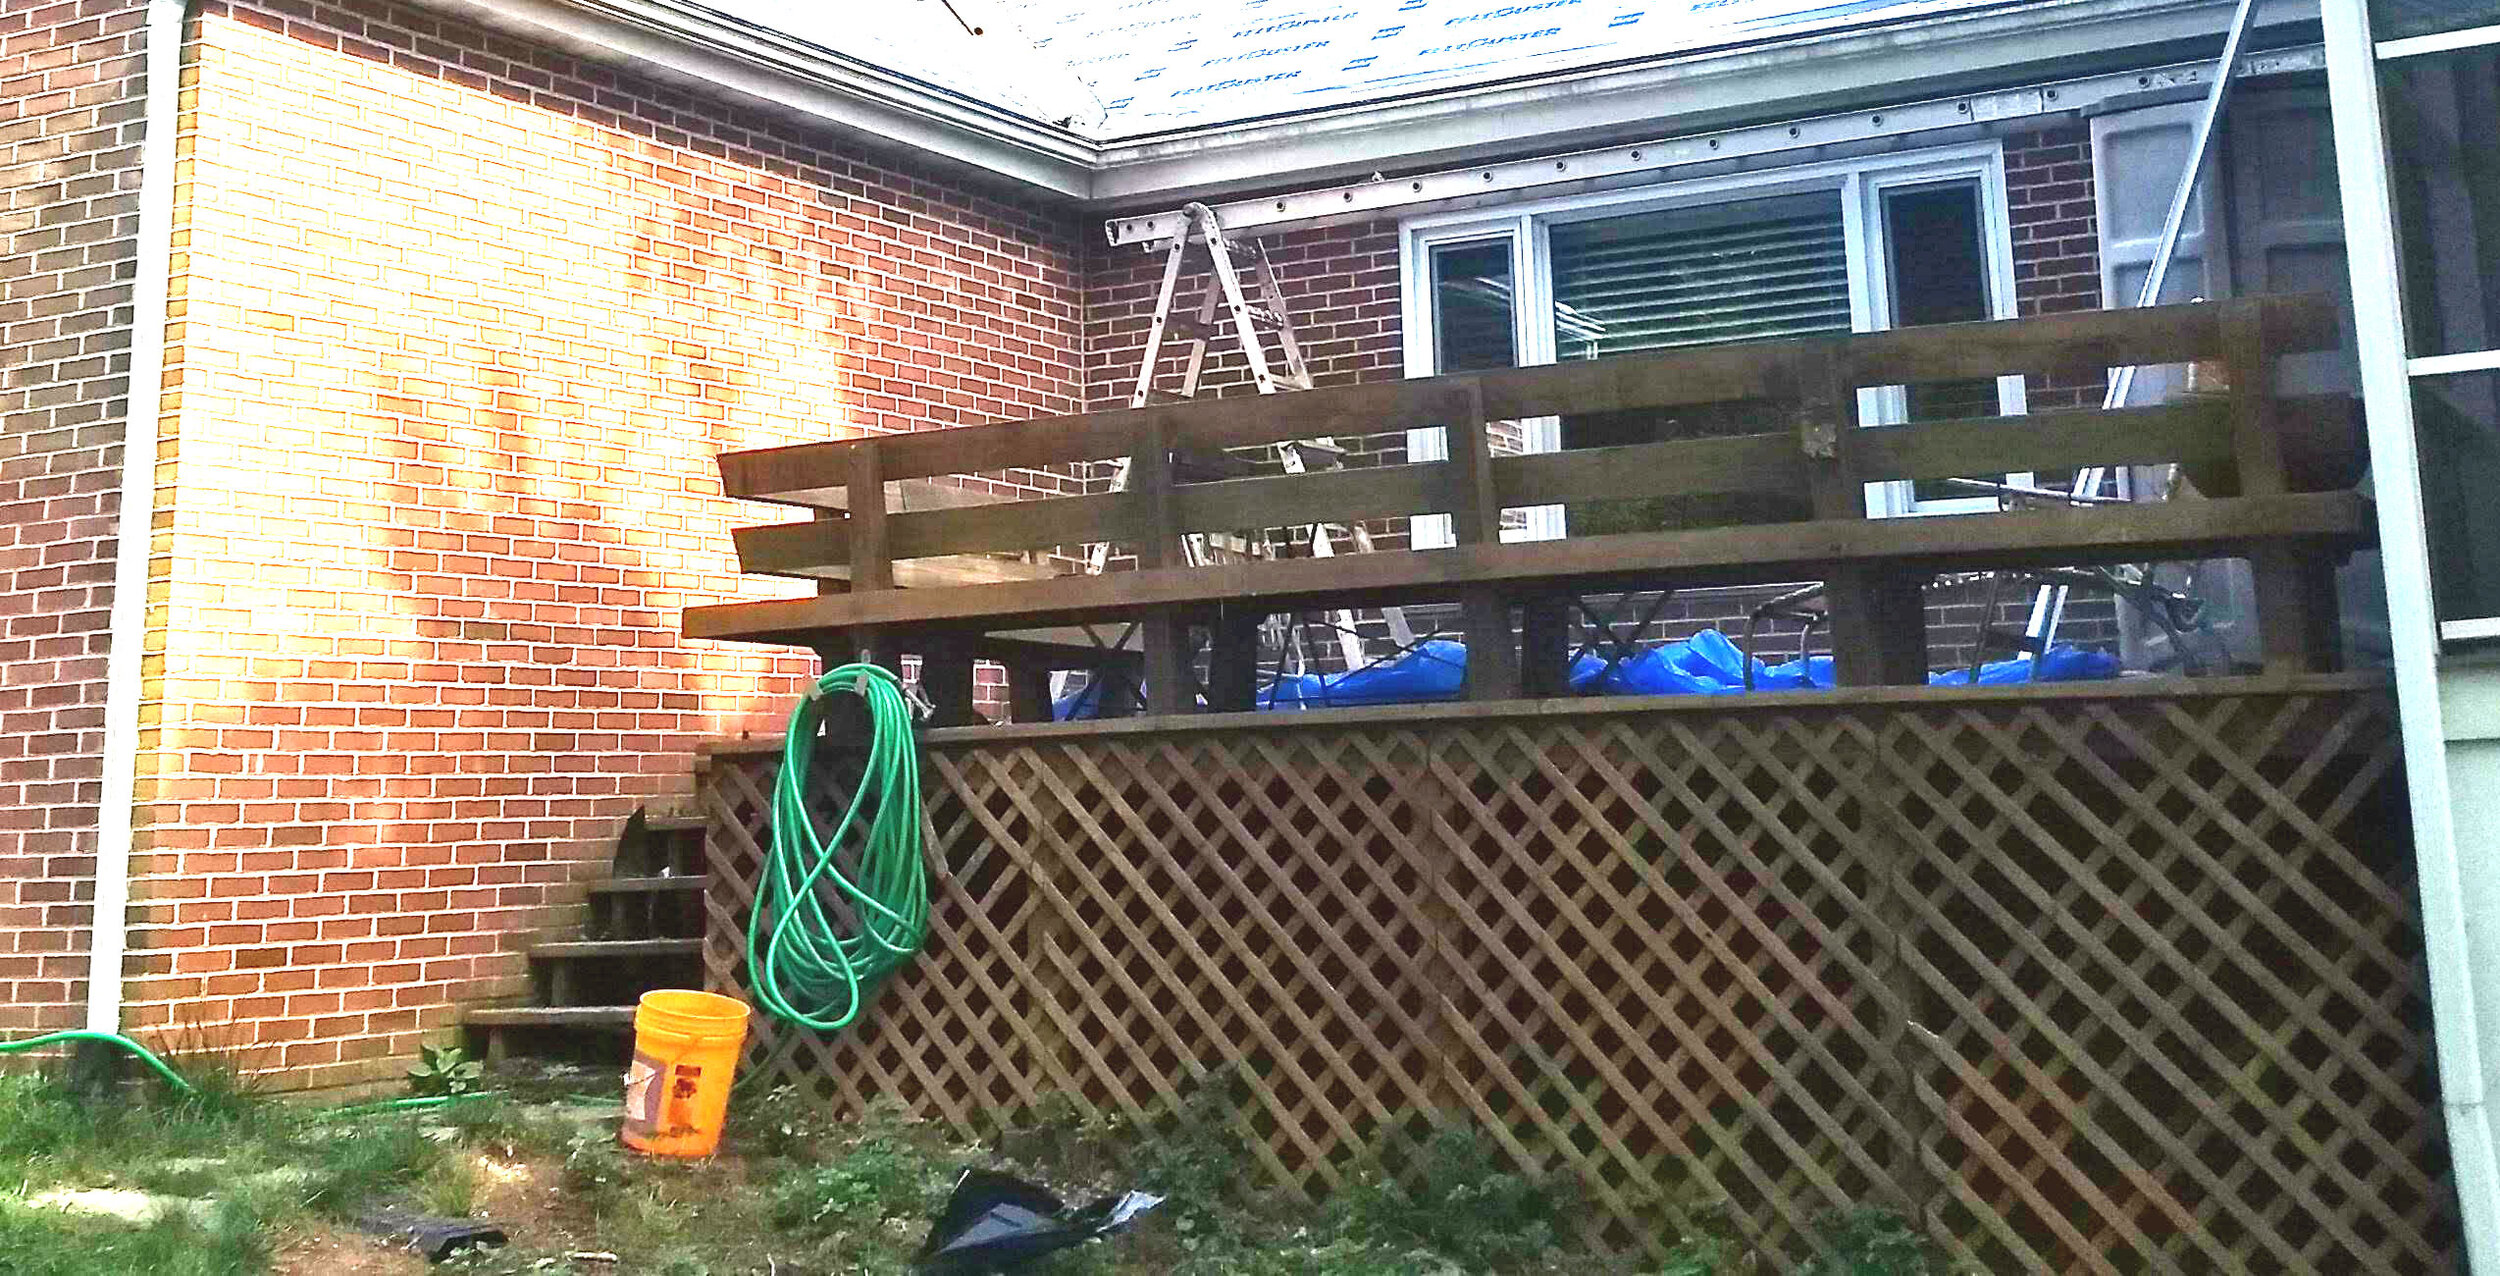
I neglected to take a really effective “before” picture but here are a few for contrast.

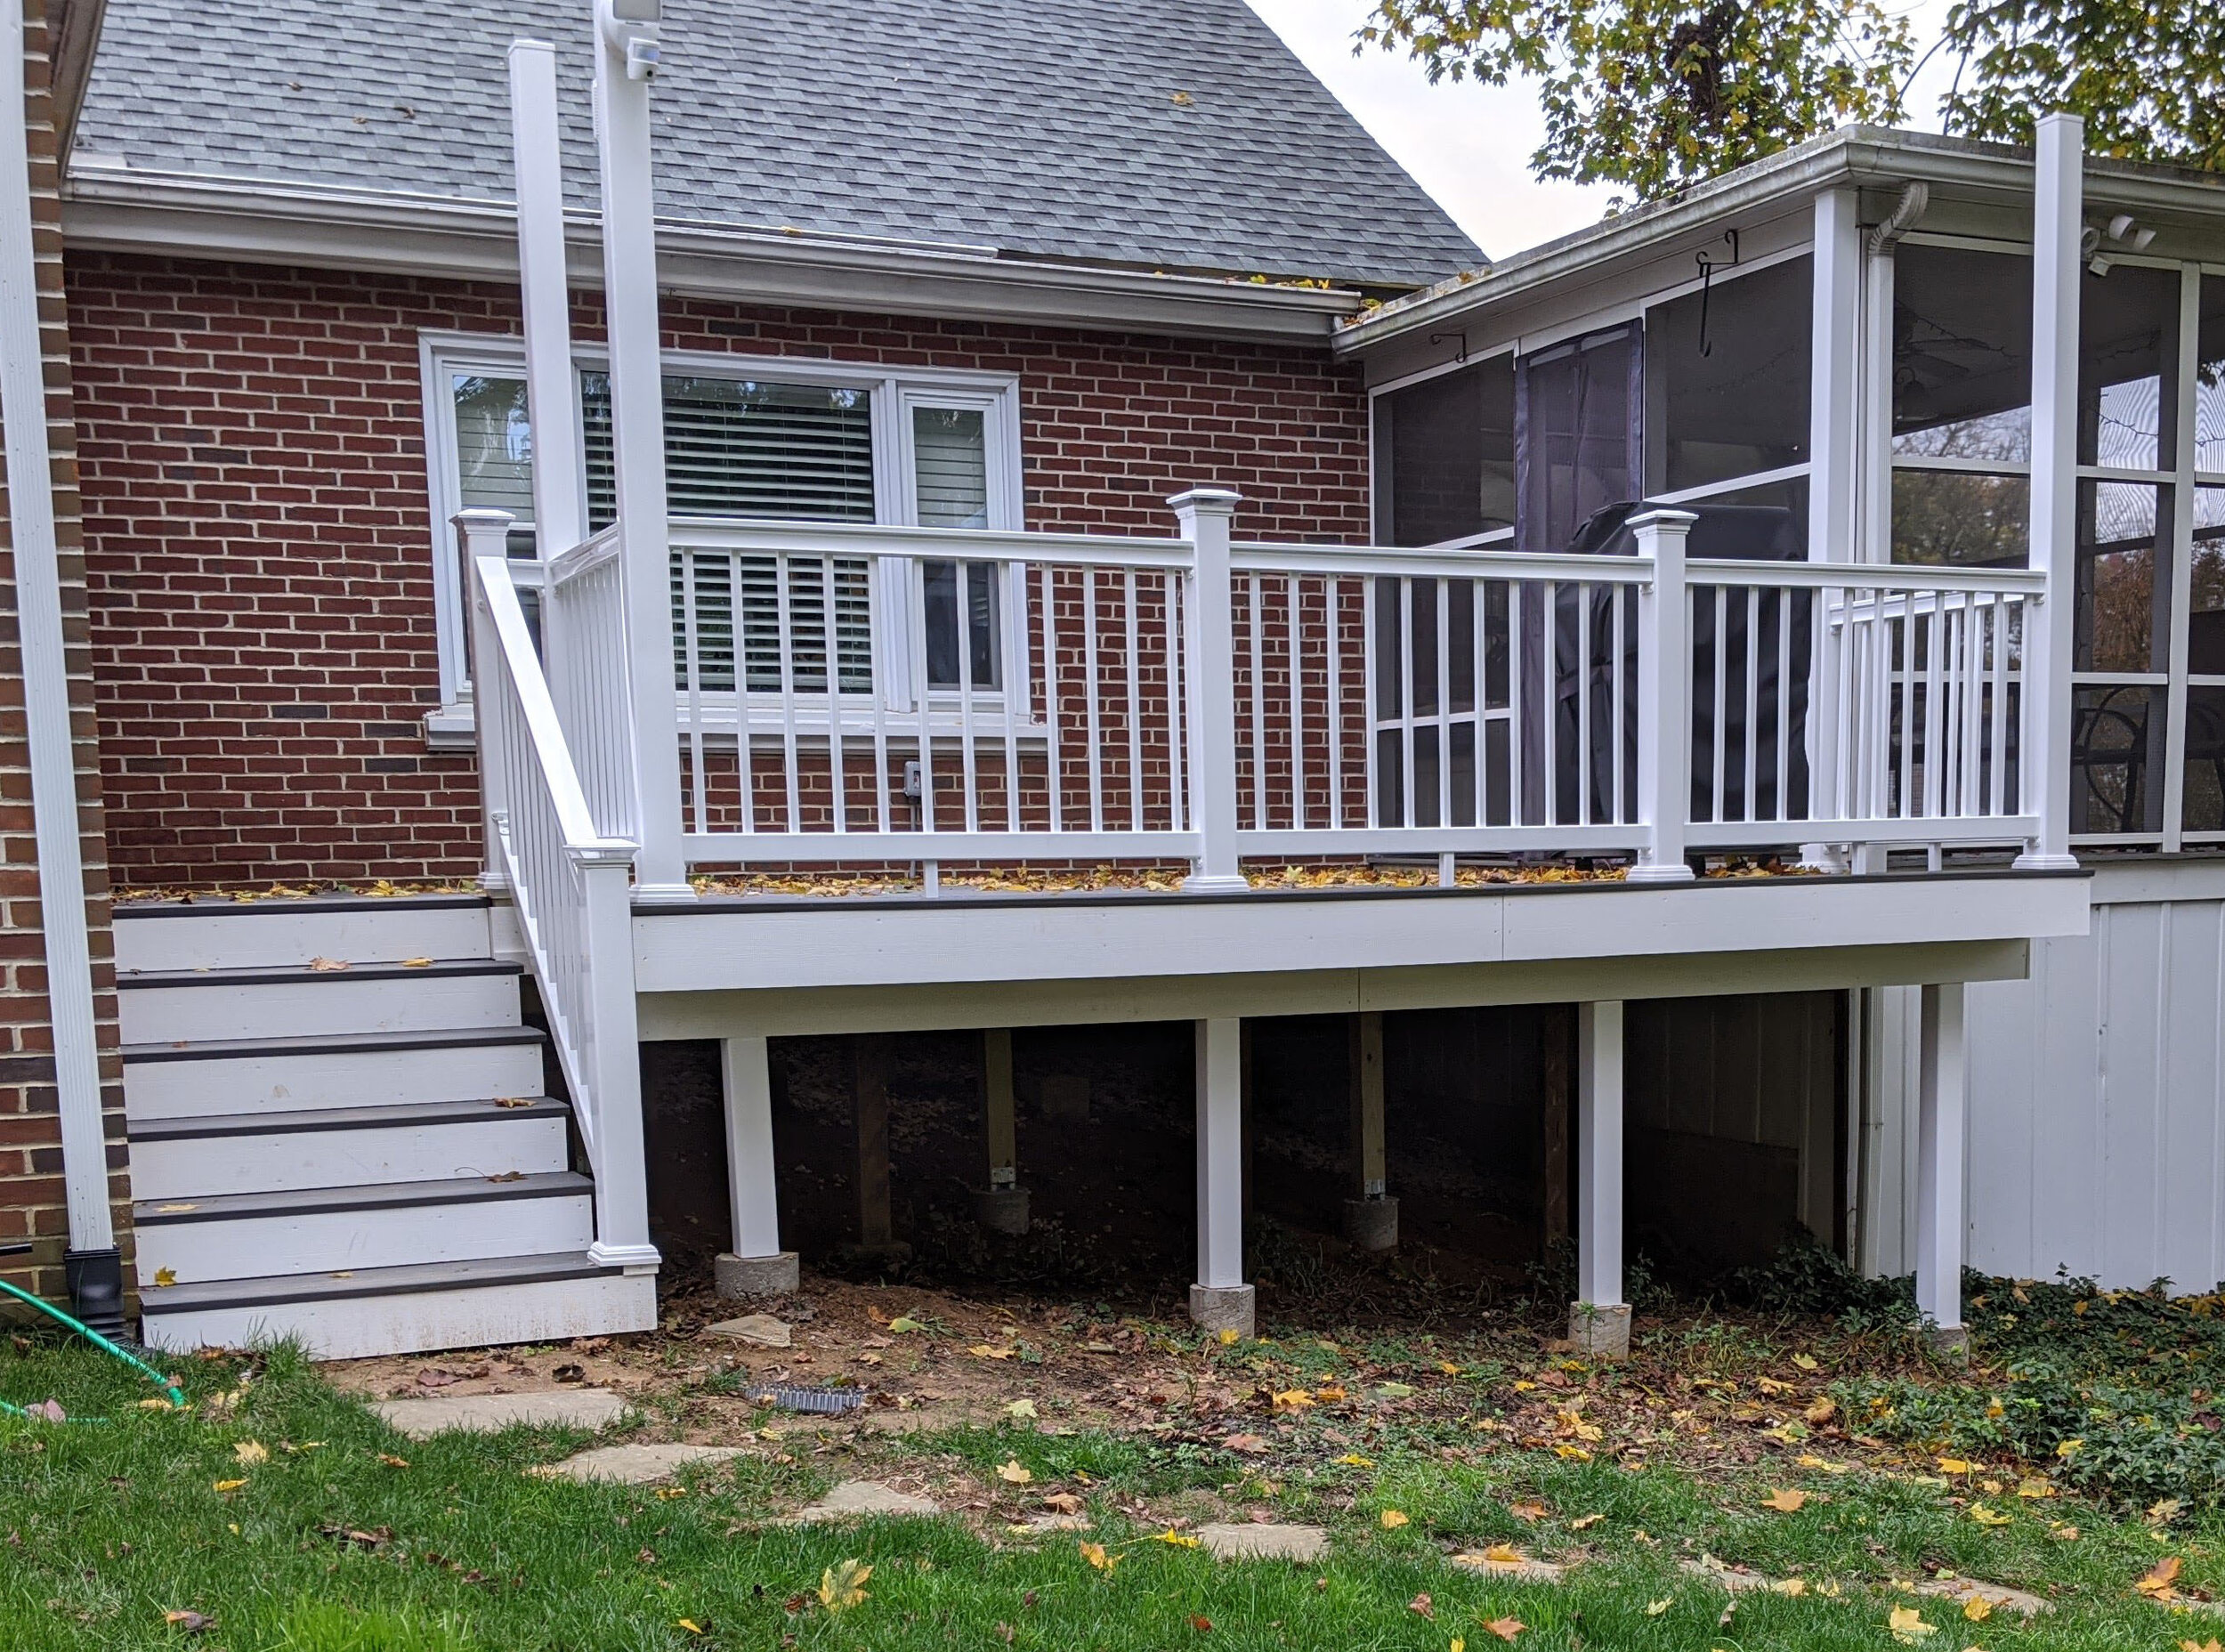
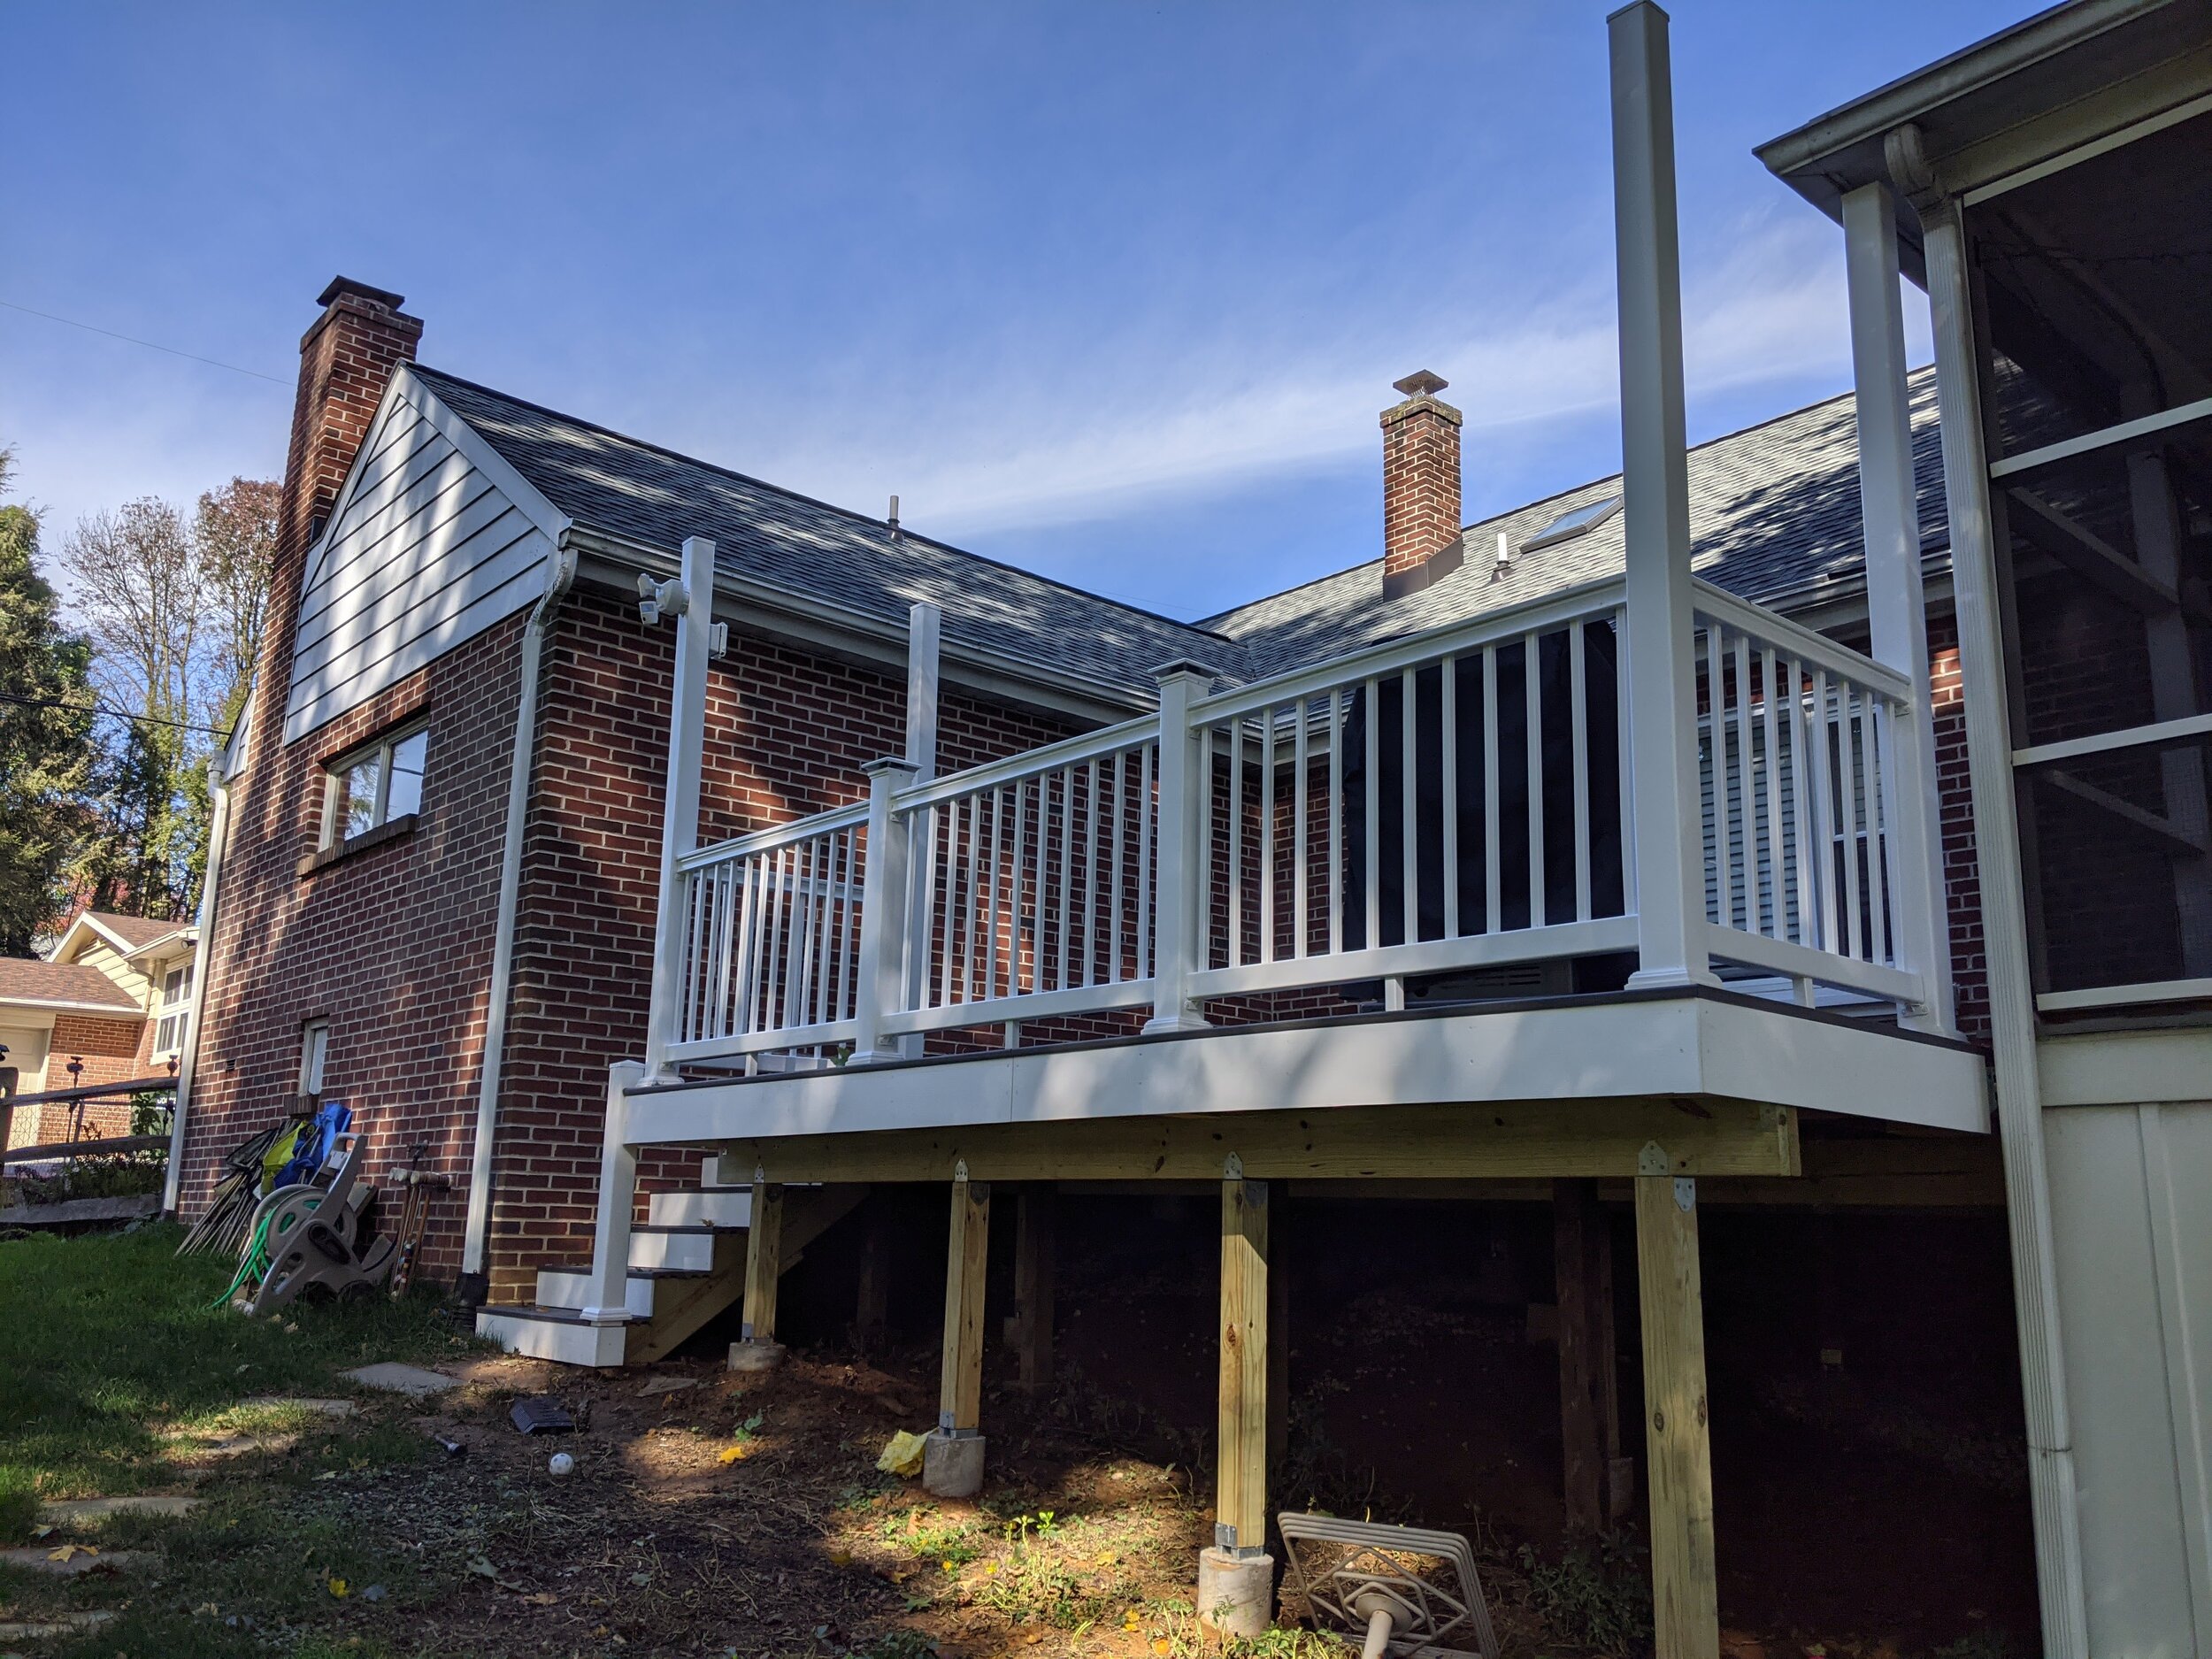
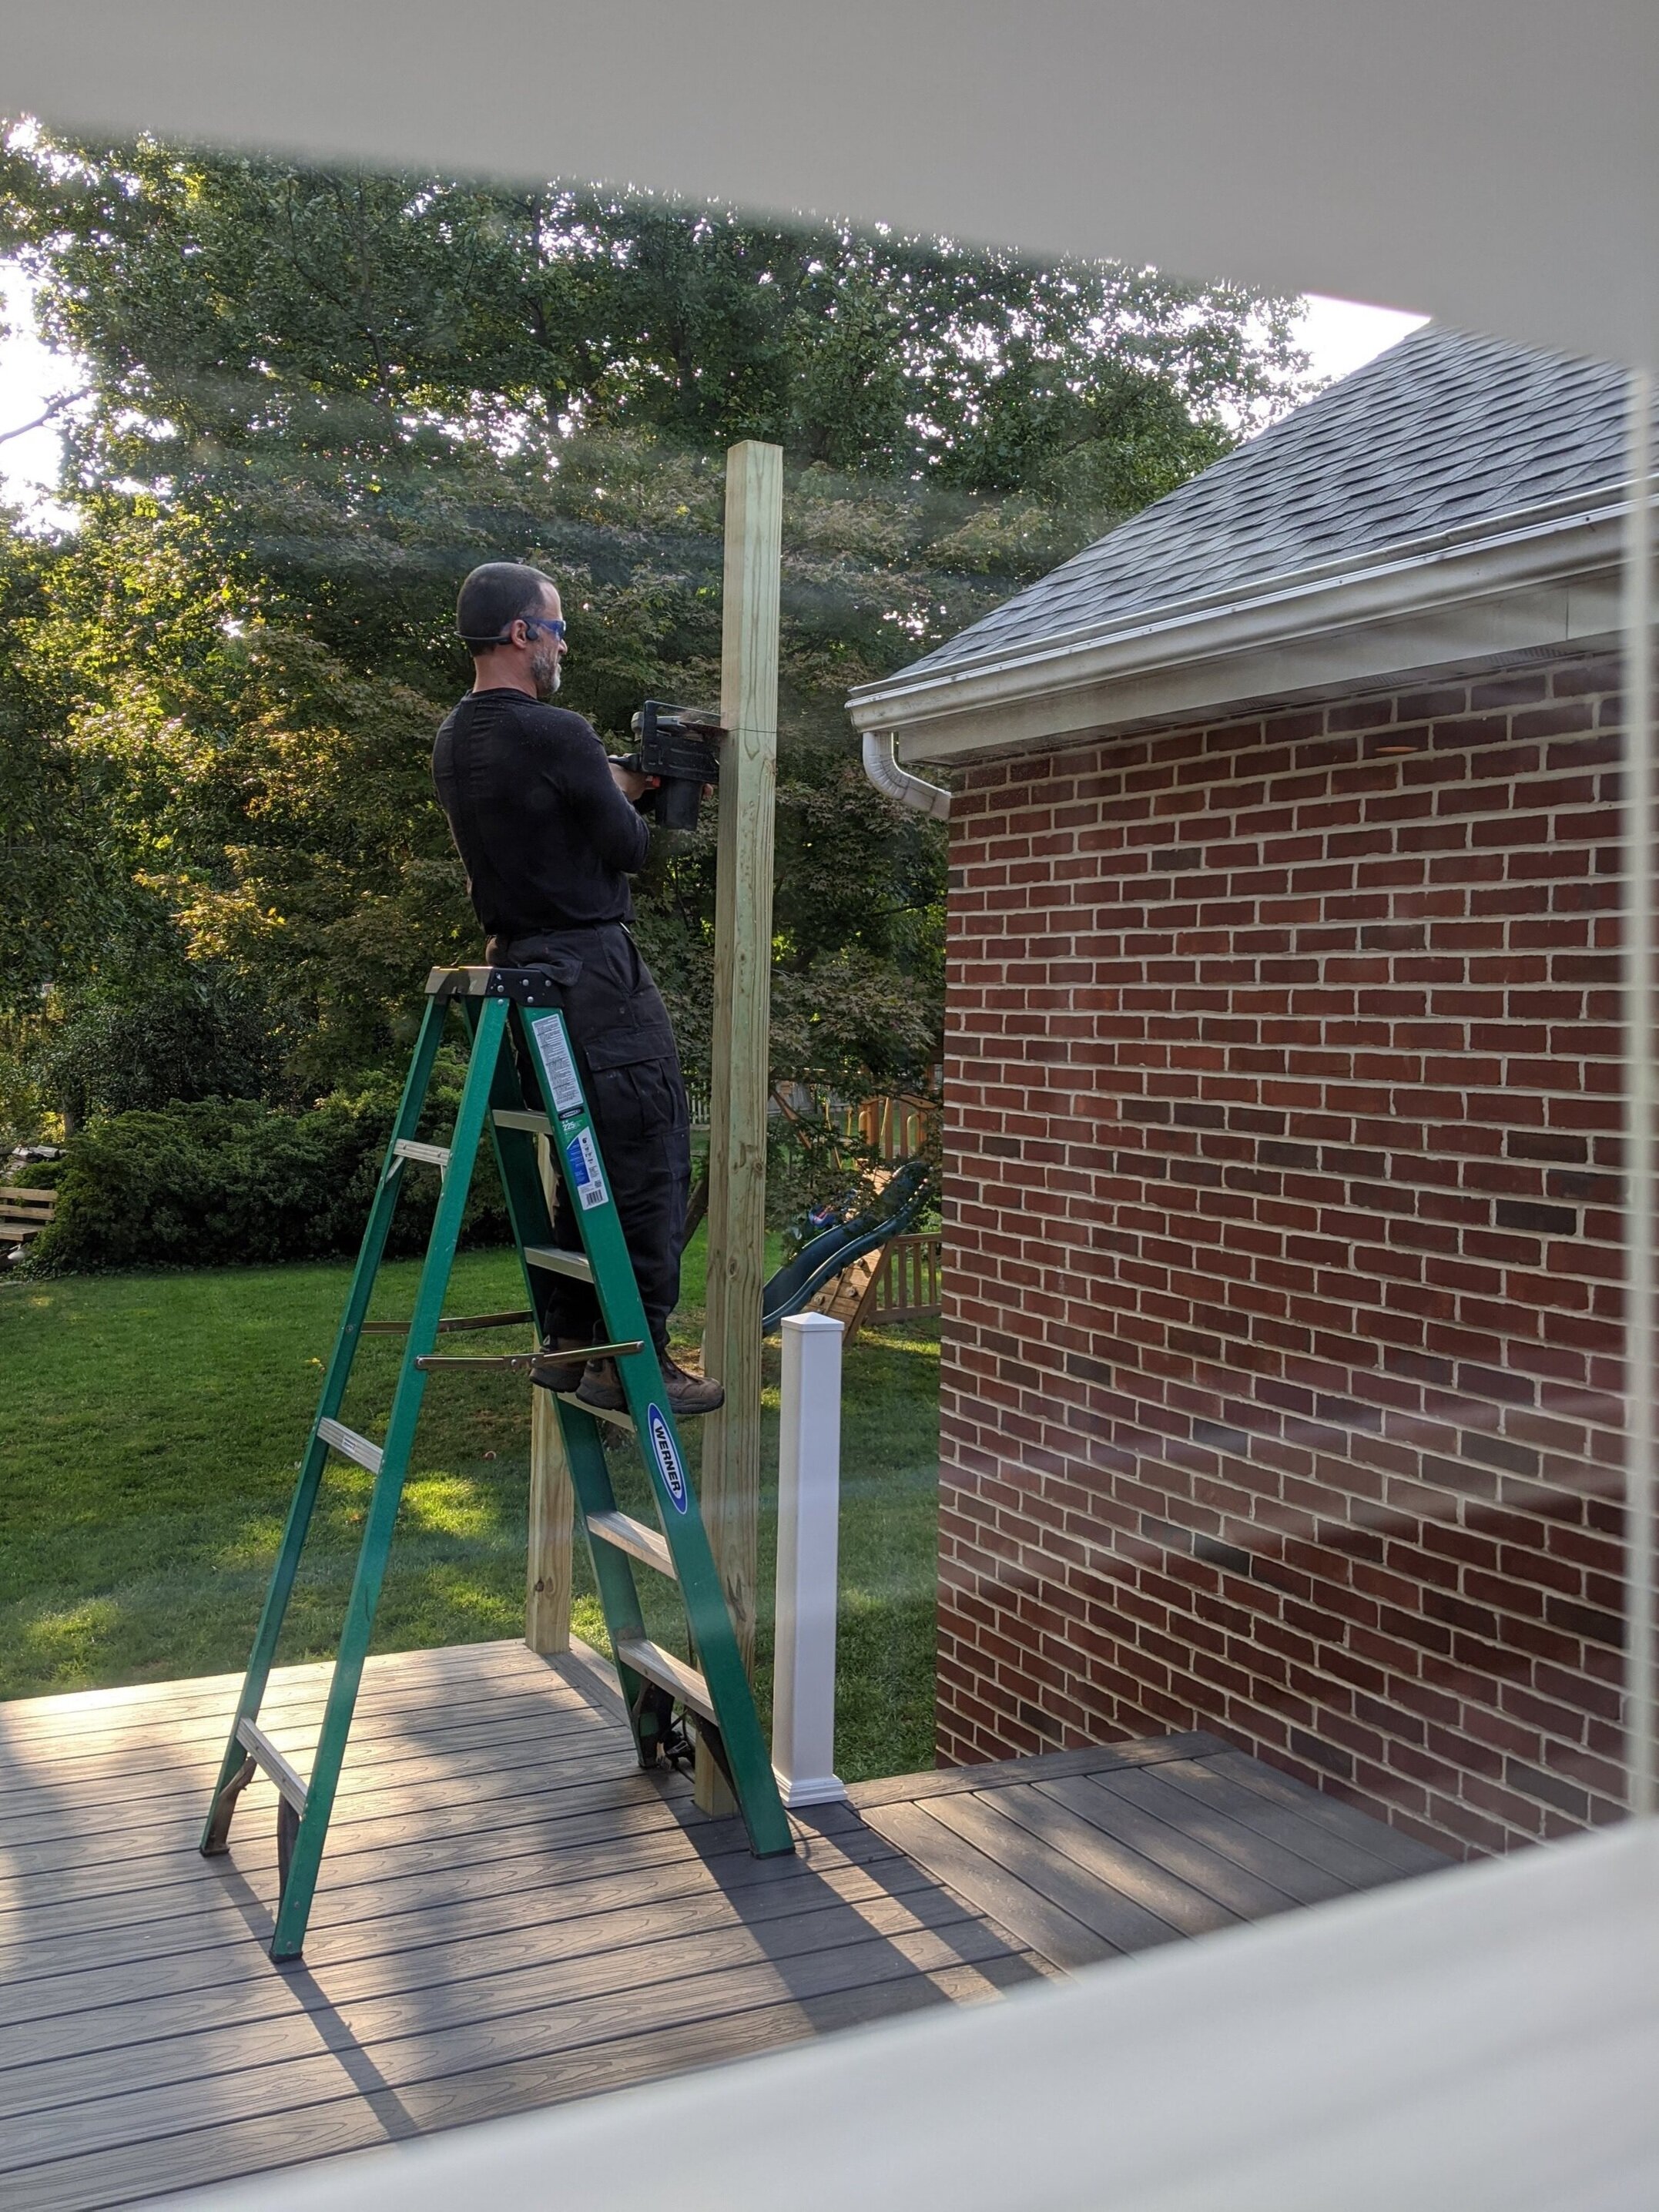
And here’s where we ended up… keep reading to see how we got there!

IMG_20170530_234034397.jpg
IMG_20170530_234416387.jpg

Click Here to View the Full Blog Archive.      


upgrading that old, yucky deck: Stair Rail and Fascia

h-upgrading-deck-stair-rail-fascia-h.jpg

The stair fascia and rail really give this deck both a beautifully finished look and an extra notch of safety. Due to the weird construction of our old deck, there wasn’t a stair rail — just the back of the bench to grab if necessary.

This is all the finishing touches!

  • Small leftover railing pieces to connect the end of the deck railing with the top of the stair rail (you might notice this is one of the plain caps on the stair stair top pillar, but we replaced that with a solar light)

  • Back stair treads and front fascia

  • Stair kickboard fascia

  • Stair handrail

You can see we still had two pillars to sleeve at this point (and the lattice to add), but he’s covered the front beam and the side of the stairs.

Here’s our final BEFORE and AFTER!

 
upgrading-deck-stair-rail-fascia.jpg


Click Here to View the Full Blog Archive.      


UPGRADING THAT OLD, YUCKY DECK: railings

h-upgrading-deck-railings.jpg

There are a ton of choices for deck railing. We ended up picking the Veranda polycomposite system with square ballusters. It was reasonably easy to install (Hubs definitely smashed my finger once which sucked), and there were several shape options to pick from. We liked the one that was flat on top.

At this point, all our pillars have the sleeves and the foot pieces, as well as caps. The tall ones that just simple $1 caps but the waist-height ones have built-in solar lights. They look really nice!

Steps:

  • Cut the top and bottom rails to the right length (unless you’re lucky enough to have 6’ gaps)

  • Make sure they fit (did you measure right?) and attach the provided brackets to those pieces

  • Attach the bottom rail to the pillars, using a level and making sure you have it an appropriate distance from the bottom.

  • Wedge all the ballusters into the pre-cut, pre-spaced holes

  • Replace the ballusters because the baby pulled them all out and it waving them around like weapons

  • Starting on one side, fit the ballusters into the top rail. (This was where the finger smashing occurred as Hubs thought I had the last one lined up and stomped on the top only to realize my hand was still in there. I’m ok.)

  • Use a level (USE THE LEVEL) and attach the top.

  • If you want, add the little center piece to the bottom. It’s just decorative.

  • Repeat for the next section.

(Remember, we are adding a pergola top to this in Phase 2, so that’s why the corner pillars are so tall.)

You can see he started a lot of the fascia already, but that’s because he was sneaking like a board at a time during down time rather than doing that all in one day.

I will cover that in its entirety next. Stair rail and fascia, and we’re almost done!

 
upgrading-deck-railings.jpg
 

Click Here to View the Full Blog Archive.      


A Year of Opportunities to Love More Children

A Year of Opportunities.png

Before you promise to lose weight, save more money, or increase your Duolingo streak, think about a New Year’s Resolution to love more children. Over 400,000 kids are in the U.S. foster care system at any given time—and there are more ways than you might think to bring them hope and love.


Offer Respite Care to Foster Families

Respite care families offer short-term stays for children in foster care. You will have to go through many of the same application process as a foster/resource family, but kids will be with you for a defined period of time—perhaps a single night, maybe a week. Foster families often face restrictions on travelling with children, so an approved place for a kid to stay while the rest of the crew visits grandma in Canada is necessary. Additionally, for a family fostering a child with special needs, you could give up 1 or 2 nights of uninterrupted sleep so those parents can recover and be filled with renewed energy to care for a child they’re committed to.

Volunteer as a CASA

Court Appointed Special Advocates (CASAs) are volunteers who’ve been trained to help kids find safe permanency. Kids in the system may change caseworkers, lawyers, foster homes, and schools—but a CASA can help provide stable oversight during the many years they are placed away from home. The insight and opinion of CASAs are often highly regarded by judges, who know these advocates have invested in the child’s life.

Become a Mentor

Contact an agency in your area and give your time. Play football, teach dominoes, correct math homework, share your dogwalking park trip, or just read aloud. Your time would be so valuable to kids seeking stability and healthy role models.

Speak the Truth About Foster Care

Misinformation about adoption and foster care abound. The truth is that 23,000 foster kids age out of the system every year, and 1 in 5 of those young people will be homeless afterwards. Adopting children from foster care can be of little or no cost, and the average time a child spends in care before being adopted is 34 months. The average child in foster care is 8 years old.

Fundraise for Foster Organizations

Whether you organize a bake sale, a 5k, an online auction, or an art show, your local foster care agency will appreciate being the beneficiary of your time and your community’s goodwill. Additionally, simply getting their name in front of new people in your church and community as a worthy cause to support can be a huge benefit to a foster care organization.

Offer Your Services to Foster or Adoption Agencies

Are you a photographer? Take free beautiful photos of kids waiting for homes. Are you able to clean or sort mail or run errands? Call a local agency and offer your time. Are you able to drive a car? Offer to help resource parents take children to appointments. Between family visits, medical appointments, and therapy—foster parents do a lot of driving. Your safe shuttling would be a blessing!

Become a Resource Family

I don’t know who I first heard say it, but my favorite answer to, “This isn’t a good time for me to become a foster parent,” is, “Well, this wasn’t a good time for this kid to become a foster child, either.” No one  wants to leave home and everything they know, but you could be the person who makes it bearable. 1 in 184 kids in the U.S. are in foster care. You can’t change the world for all those children, but you can change one child’s whole world.


Click Here to View the Full Blog Archive.      


UPGRADING THAT OLD, YUCKY DECK: electrical

h-upgrading-your-deck-electrical.jpg

So, why did we need electrical on our deck? For a crock pot at picnics? For a coffee pot? Well, yes, but also in the words of Hubs that I will never forget, “Don’t you wanna put twinkle lights up on the pergola?”

Hilarious.

I mean, of course, YES, I am a human so I love twinkle lights. But it’s these little touches that he thinks of that make the projects so special. Anyway, turned out he also wanted to add a motion light with a security camera BUT still. Ladies, get you a man who thinks of twinkle lights.

First, he had to cut off the top of the pillar because we’d somehow managed to only remember to cut three of the four to the right height.

The electrical wires did fit inside the tall pergola-height pillar, but it turned out to be REALLY hard to get Hubs’ man-sized hand into the sleeve. I would’ve helped but I get scared on ladders that are perched a quarter inch from the corner of a deck with no railings.

Anyway, he got it eventually. I took a lot of pictures.

At the top of that pillar, we have a very futuristic electrical box, plus a security camera and light.

P.S. DO NOT do electrical work if you don’t know what you’re doing. There are no second chances with shocking yourself or setting something on fire. Just don’t do it.

We also have an electrical box at the back near our house and one under the lip, underneath this pole.

You can see we put the composite sleeves on all the 4 x 4 pillars now, as well as the caps and foot pieces.

Railings are next! Keep reading…

 
upgrading-your-deck-electrical.jpg
 

Click Here to View the Full Blog Archive.      


UPGRADING THAT OLD, YUCKY DECK: laying composite deck boards

h-upgrading-deck-laying-composite-decking-boards.jpg

Ladies and gentlemen, welcome to THE MAIN EVENT! Actually, it isn’t. In the grand scheme of this deck reno process, this might have been the most exciting change. However, it actually was a reasonably fast process because of excellent tools and hardware.

ABOUT COMPOSITE DECKING

We wanted a low maintenance deck. We didn’t want to put this much effort in and have to sand and seal and re-stain next year. Plus there are a LOT of great products out there, in many colors and textures. This is Deckorators Tidal Gray. I’m very happy with the results.

However, this meant extra supports underneath because while a 2 x 4 of wood can span several feet, composite needs the supports closer. Don’t miss this step or your deck will sag.

PXL_20201023_230121879.jpg

LAYING THE PATTERN

Unless you want to special order, deck boards only come in lengths up to 16’. Our deck is 16’ x 20’, but due to the skeleton frame we were keeping, we decided to lay the boards the way they had previously gone. I actually think the pattern adds a little interest. I like the stair approach pointing you on your journey. Make sure you measure so that you aren’t going to end up with a weird gap or a 1” slide of a board at the end across from where you start.

You can see we toyed with a bunch of options, including angling the side at a 45, but we ultimately decided we liked the 90 so it was a contrast heading to the stairs.

START WITH THE FRAME/EDGE

We began with the edge, which meant a LOT of cutting to go around the pillars. But we wanted to be sure this very visible part was just right. As you can see, it turned out fantastic. After the edge, we did the short pieces heading up to the stairs.

Please note that we didn’t have to cut out the little skinny pieces because they’ll be covered by the pillar’s bottom composite decorative pieces, but Hubs is a perfectionist.

WHAT ARE THOSE CONNECTOR PIECES?

I absolutely love the seamless look of this — no screw holes (except on the edge pieces that don’t have grooves).

Basically, you screw the first plastic connectors into the beam (just lightly) in a row against your edge, then slide the deck board in and the connectors fit into the grooved side. Then you press the next board in and go back through and tighten the screws all the way down.

Whatever brand of decking boards you chose will have a coordinating set of connectors and tell you how many square feet they’ll cover.

You’ll see we finished REALLY late at night (classic us) and Hubs wanted credit for finishing in a headlamp, so I took the picture. Then the next morning to add a gorgeous touch, I slid on the composite sleeves and feet just so I could jump around and clap at how truly beautiful it was going to be.

IMG_20200920_084546.jpg

Keep reading! Electrical and railings are on deck… (lol that’s a baseball decking pun)

 
upgrading-deck-laying-composite-decking-boards.jpg
 

Click Here to View the Full Blog Archive.