DIY BATHROOM RENO, PHASE 7 - tiling the floor

bathroom-renovation-p7-hor.png

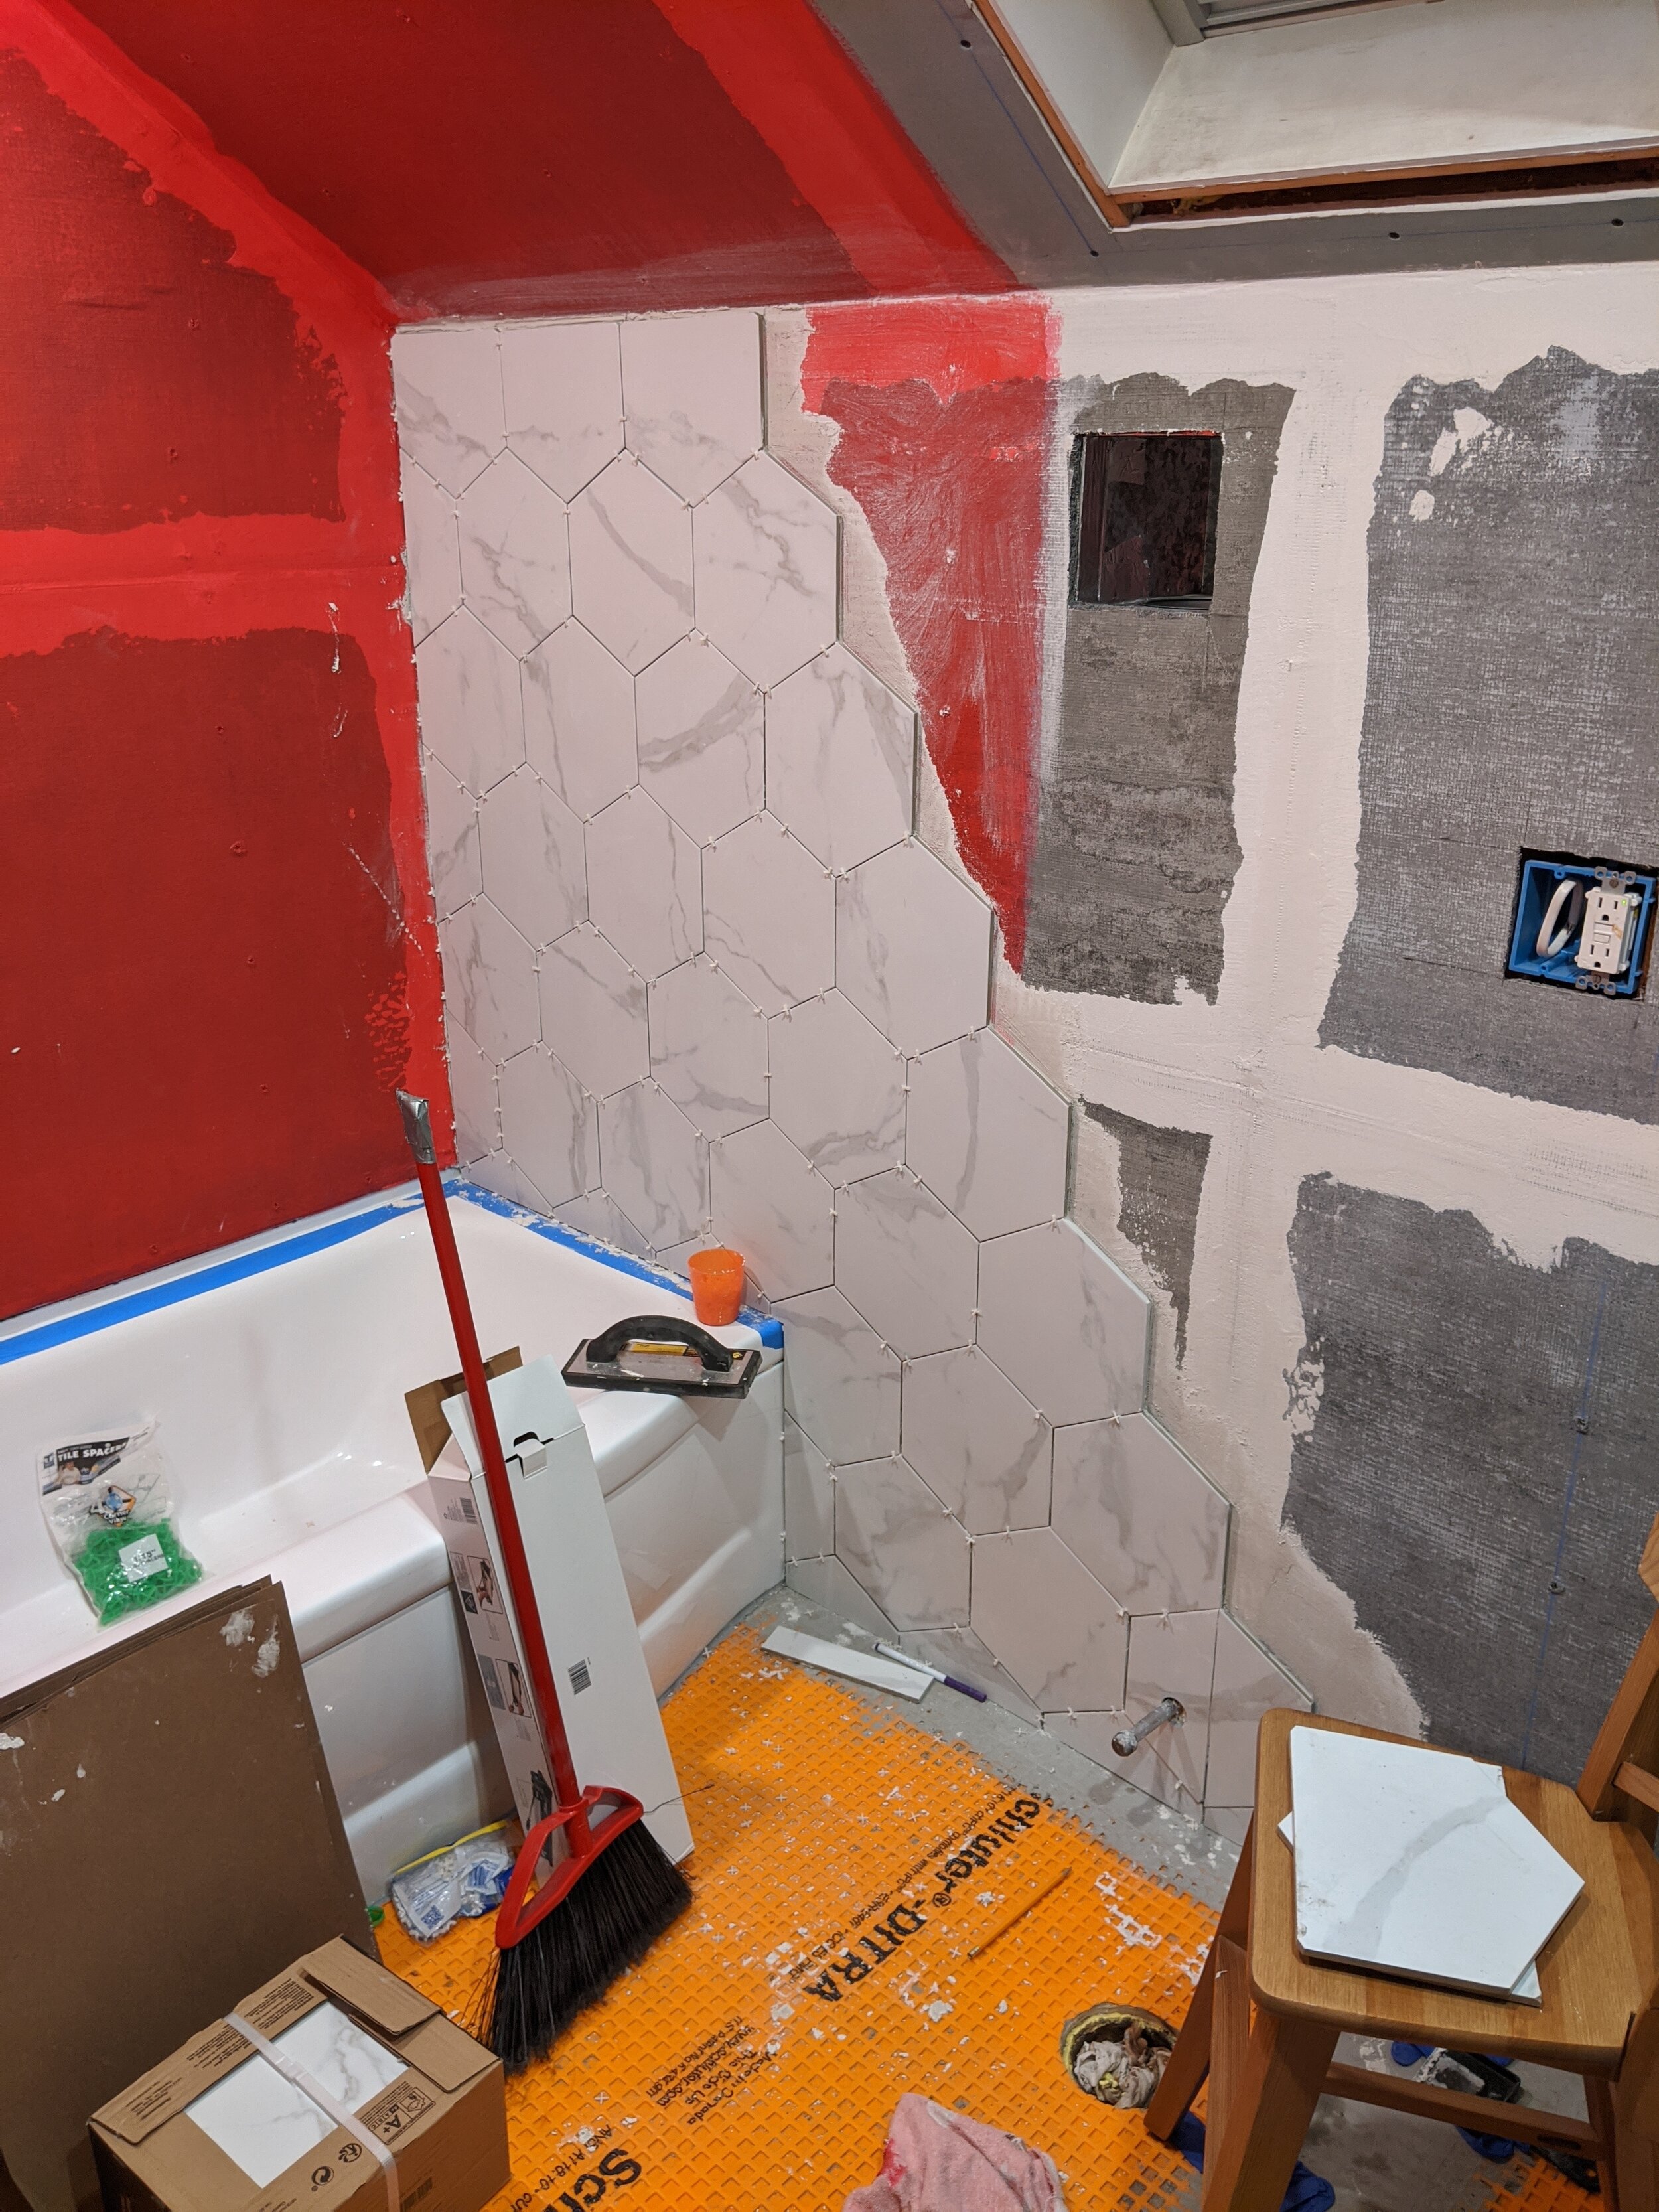
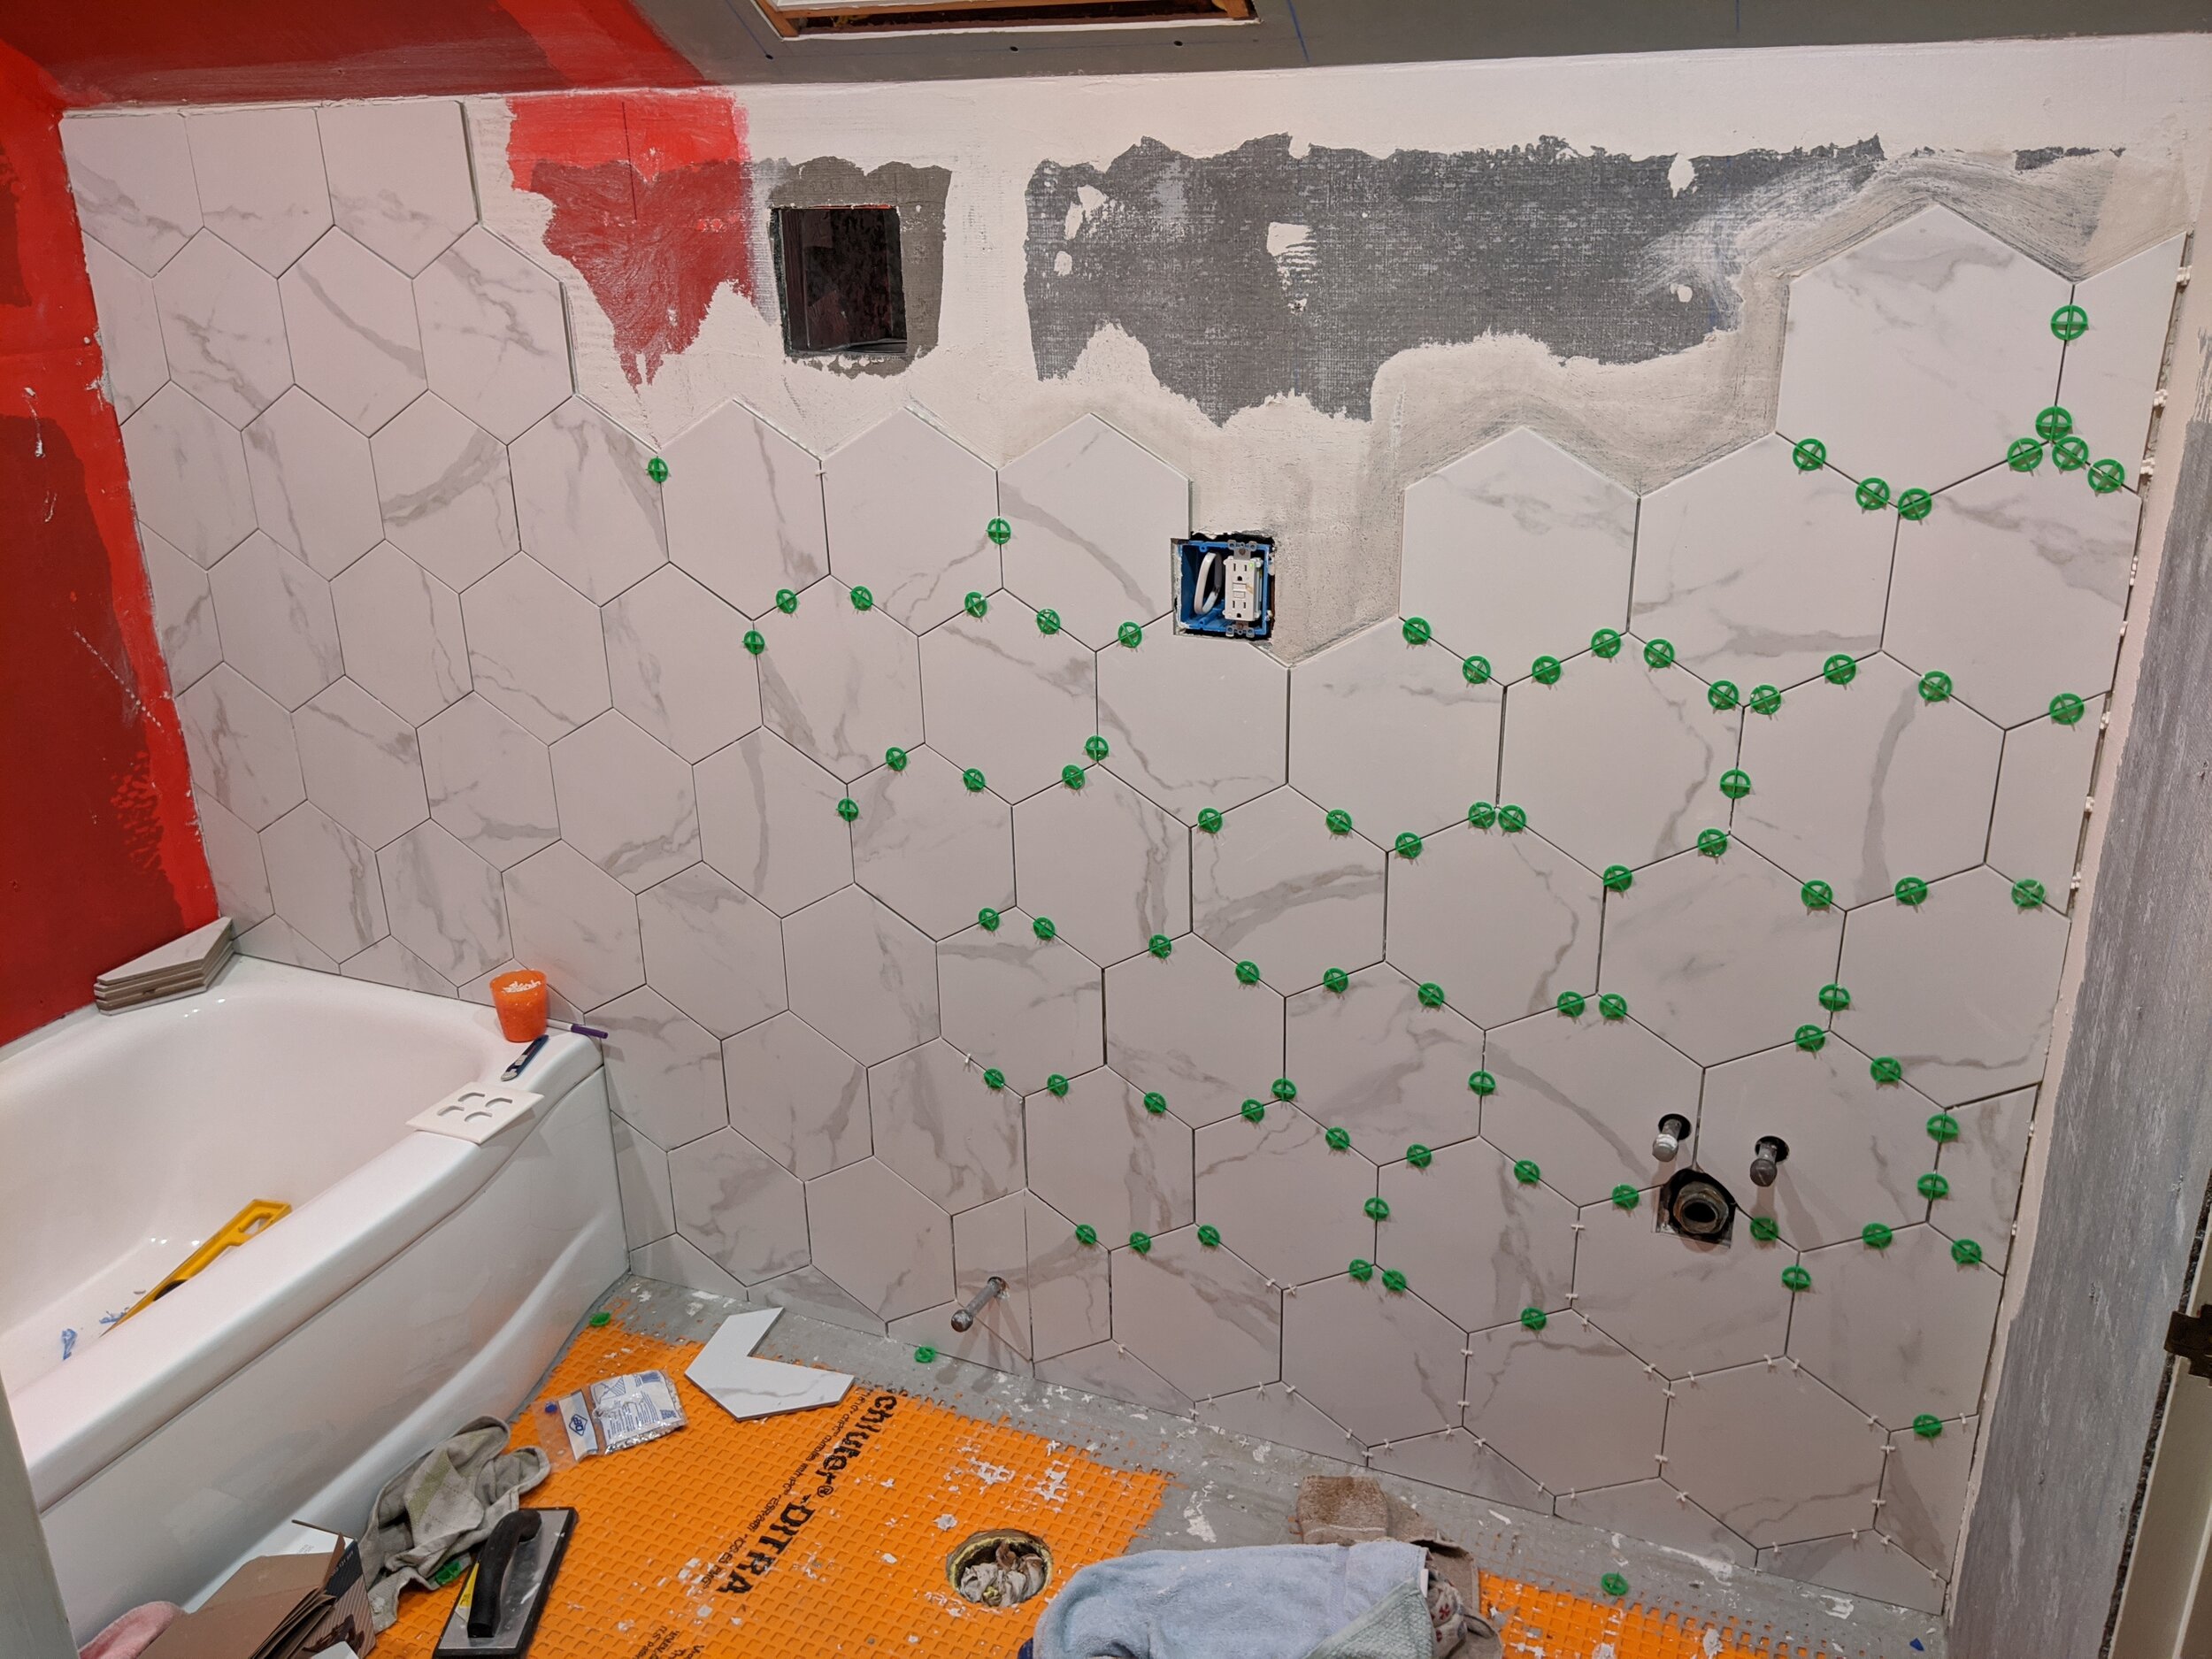
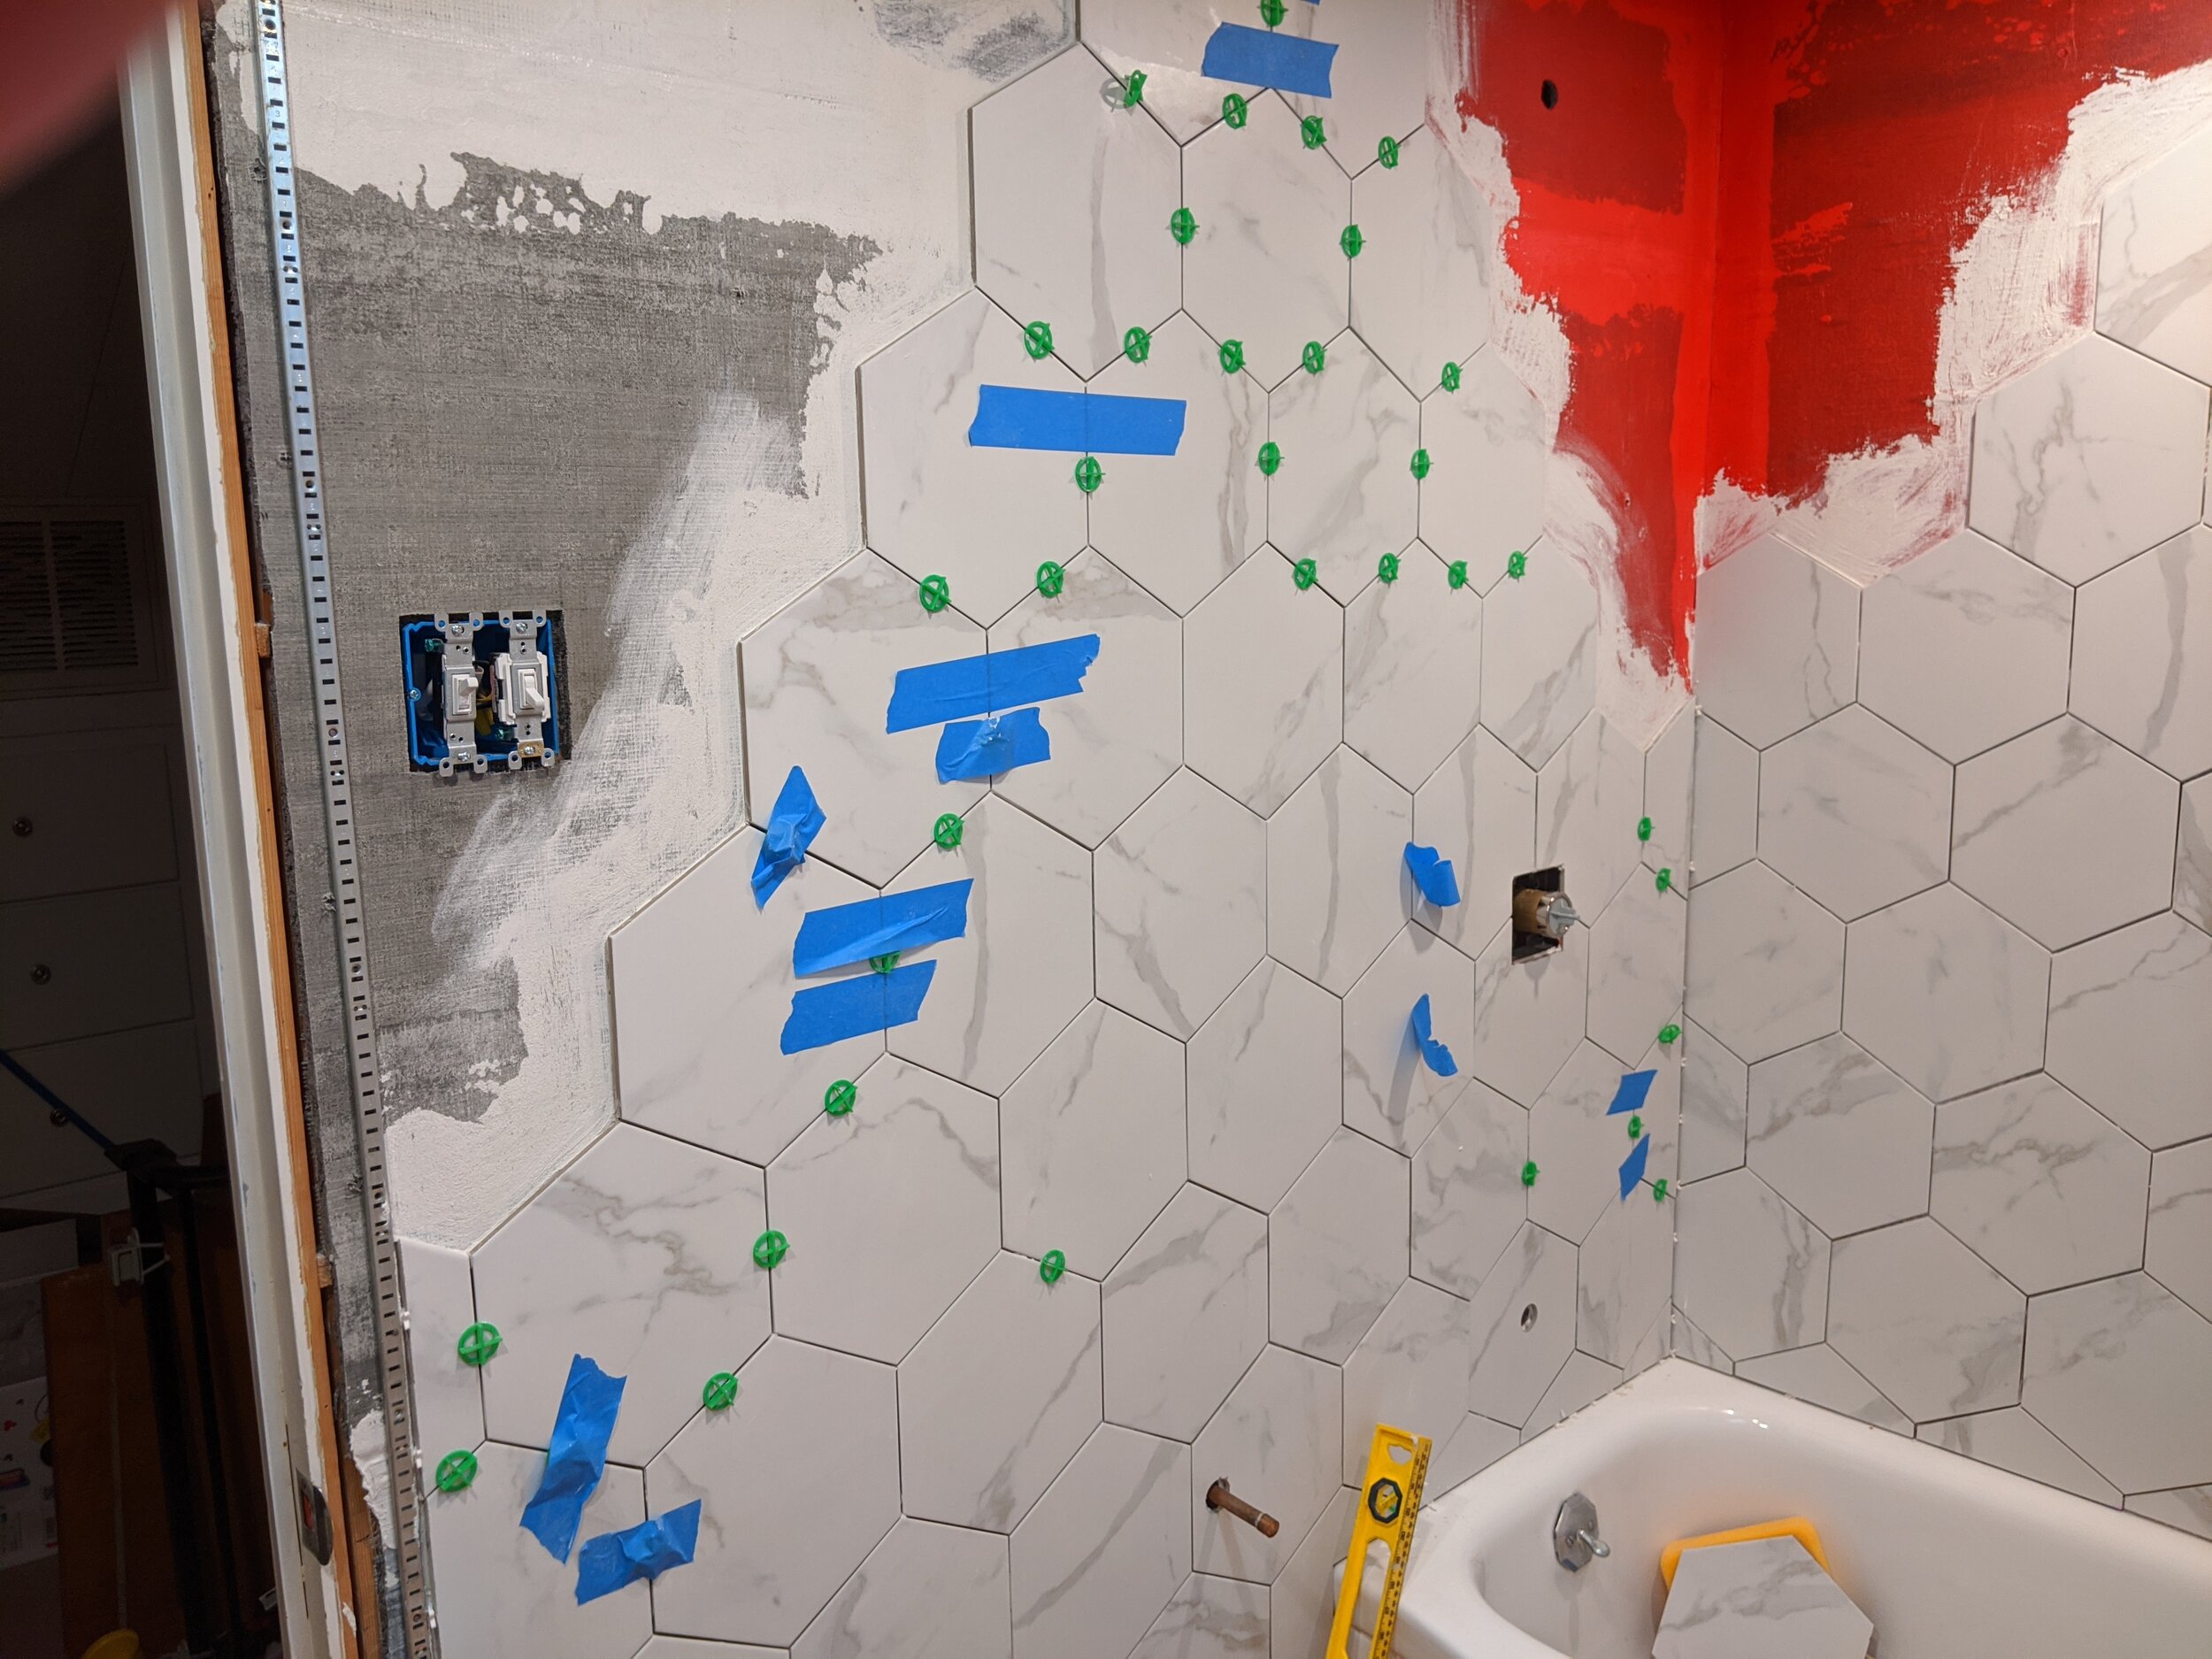
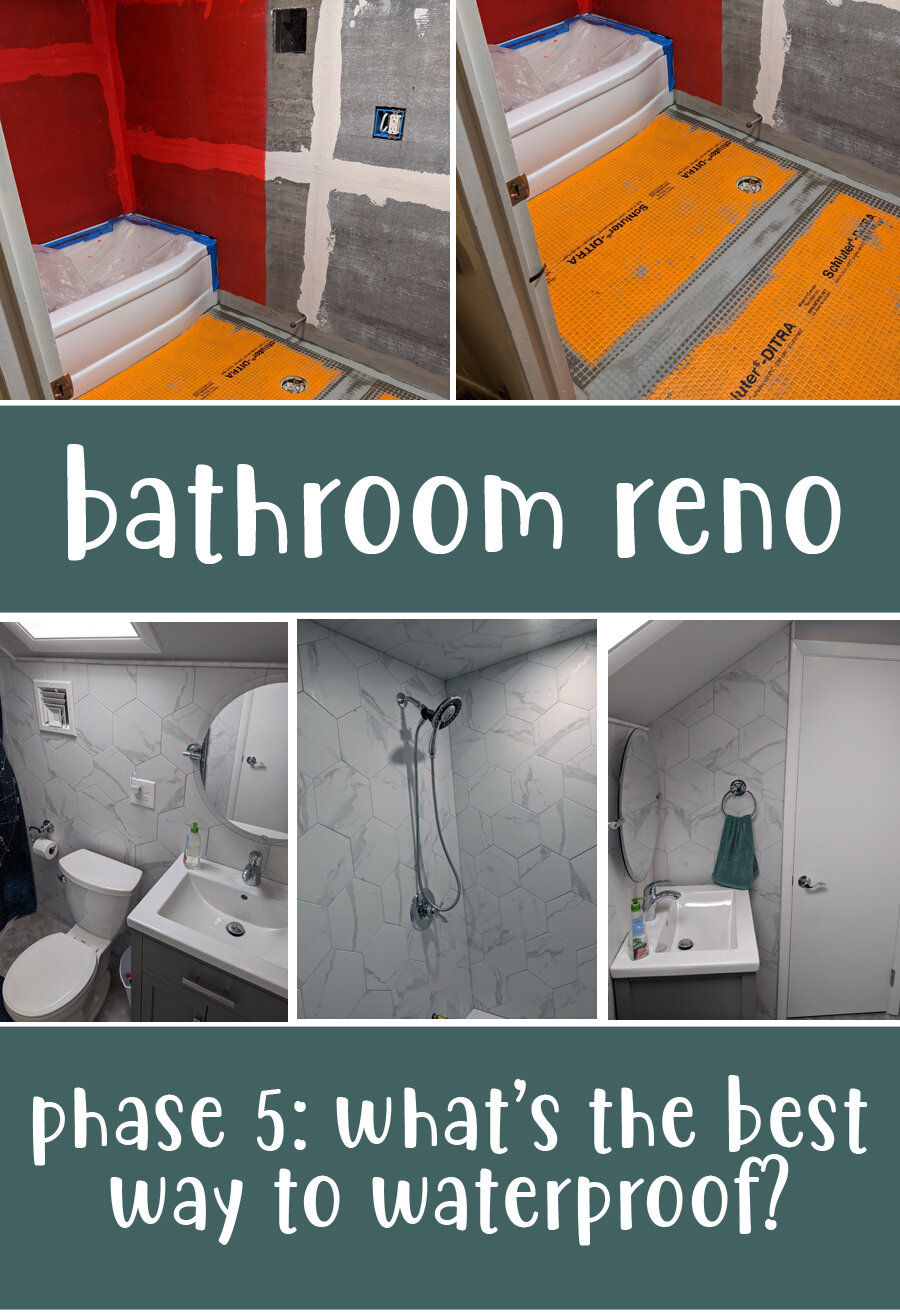
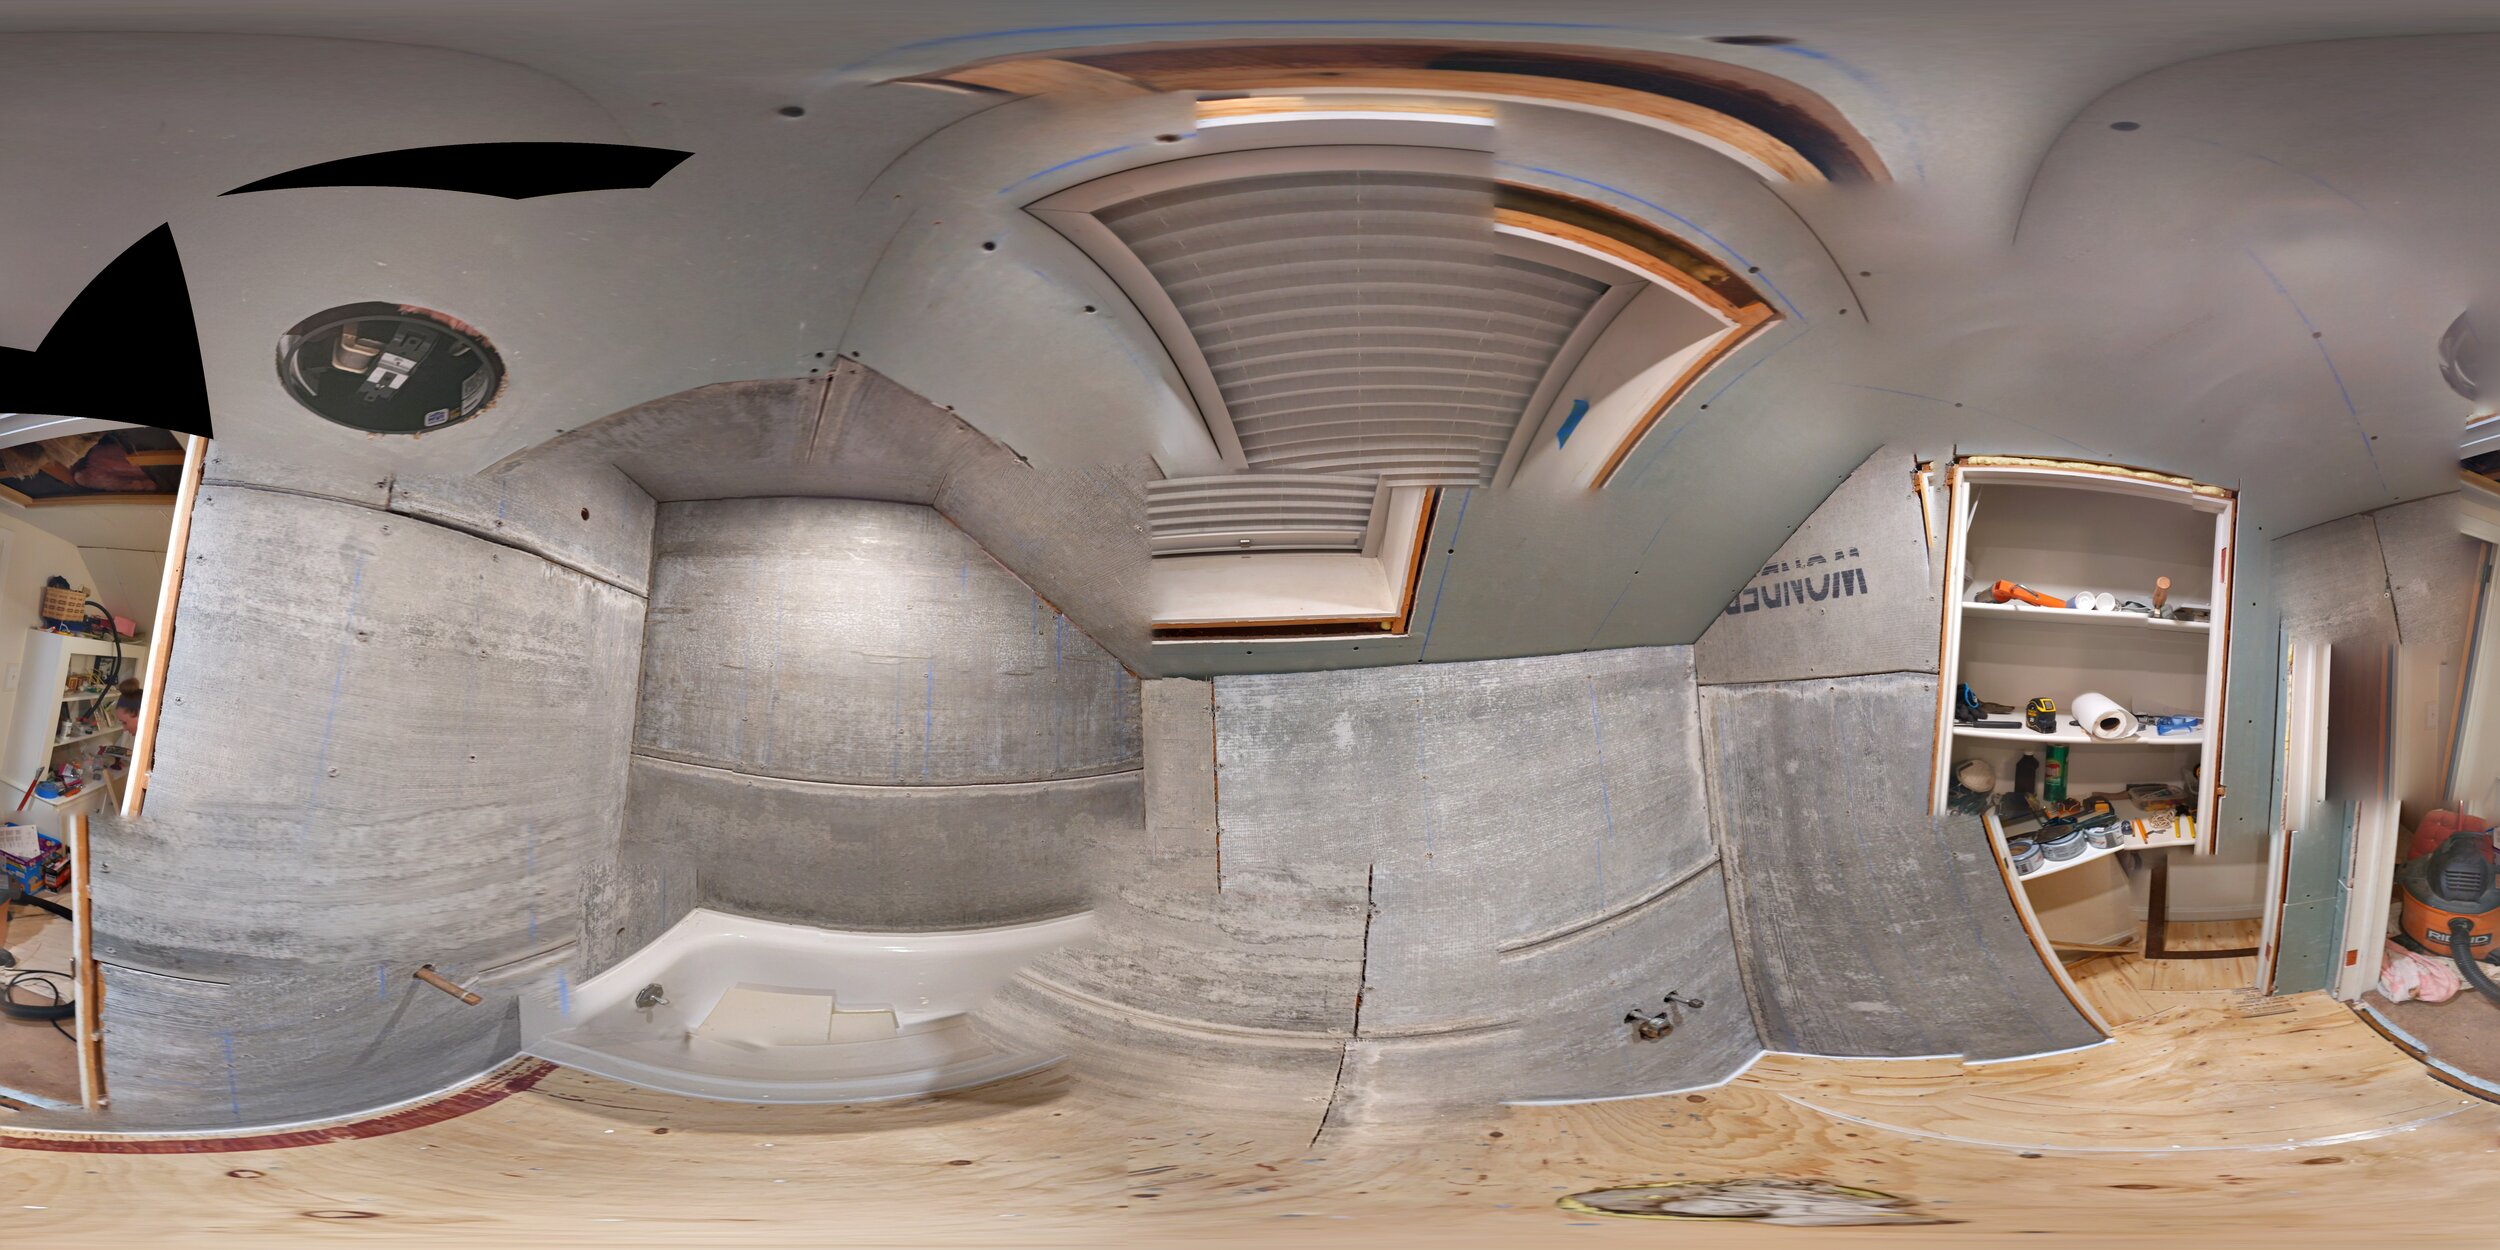
So the walls and ceiling are done… just gotta get something on this floor. After the hexagon tiles and So. Much. Cutting., these squares should be a breeze!

…Only, I wanted them offset AND at an angle. Did I mention my husband is long-suffering with my ideas? Once again, something that could have been fine and simple was instead complicated—but, I think, a better end result.

NOTE: Skip back if you want to see an overview (including “the before”) or previous steps we’ve already completed, or skip ahead if you’re looking for a different step in the process.

IMG_20200507_203111.jpg

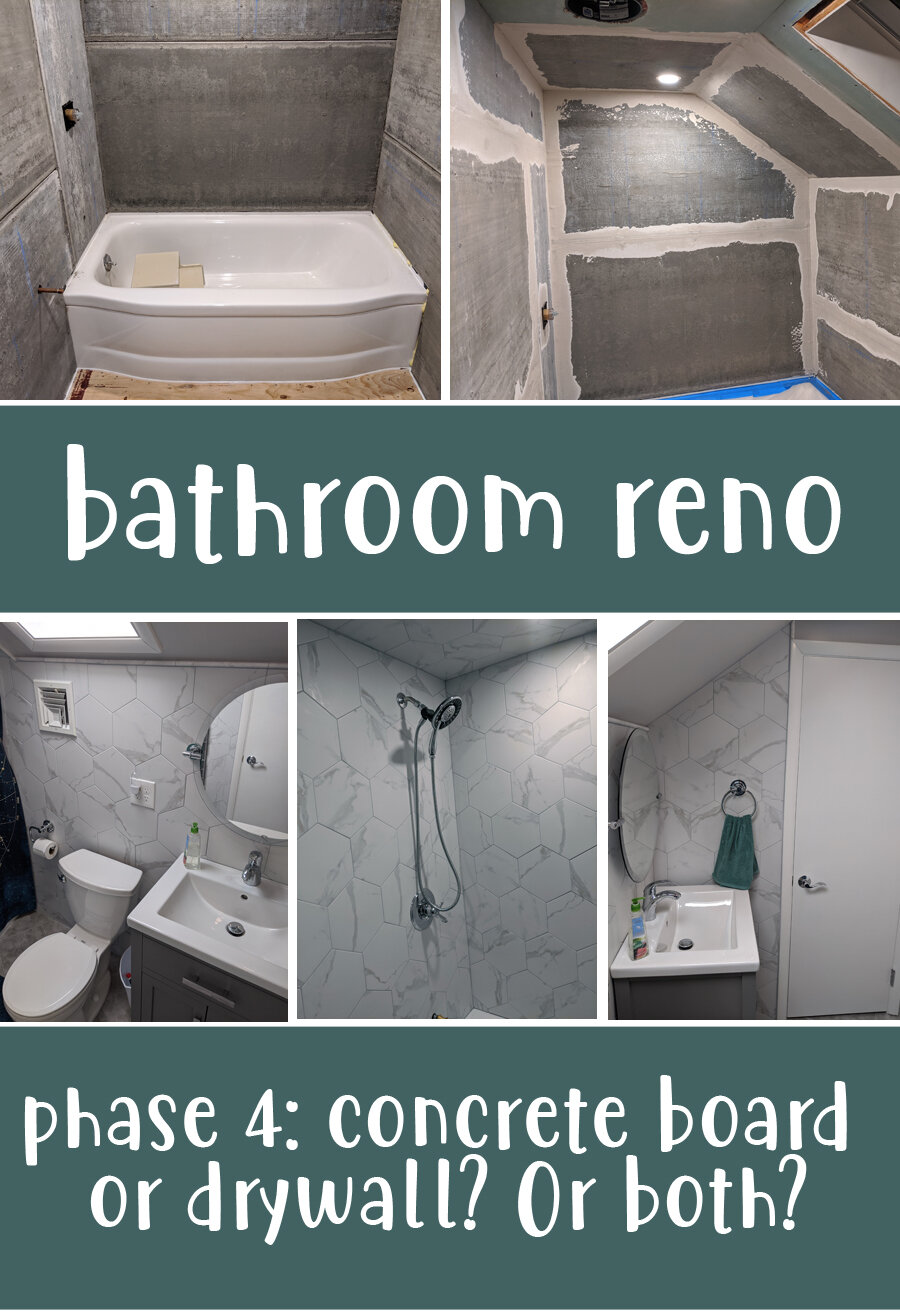
STEP 11: Tiling the floor

Tiling the floor doesn’t end up functionally being a great deal different than the walls. Make sure you read the labels to be sure your tile selection is made for traffic. We used a 12” square in light grey.

LAY OUT YOUR PATTERN

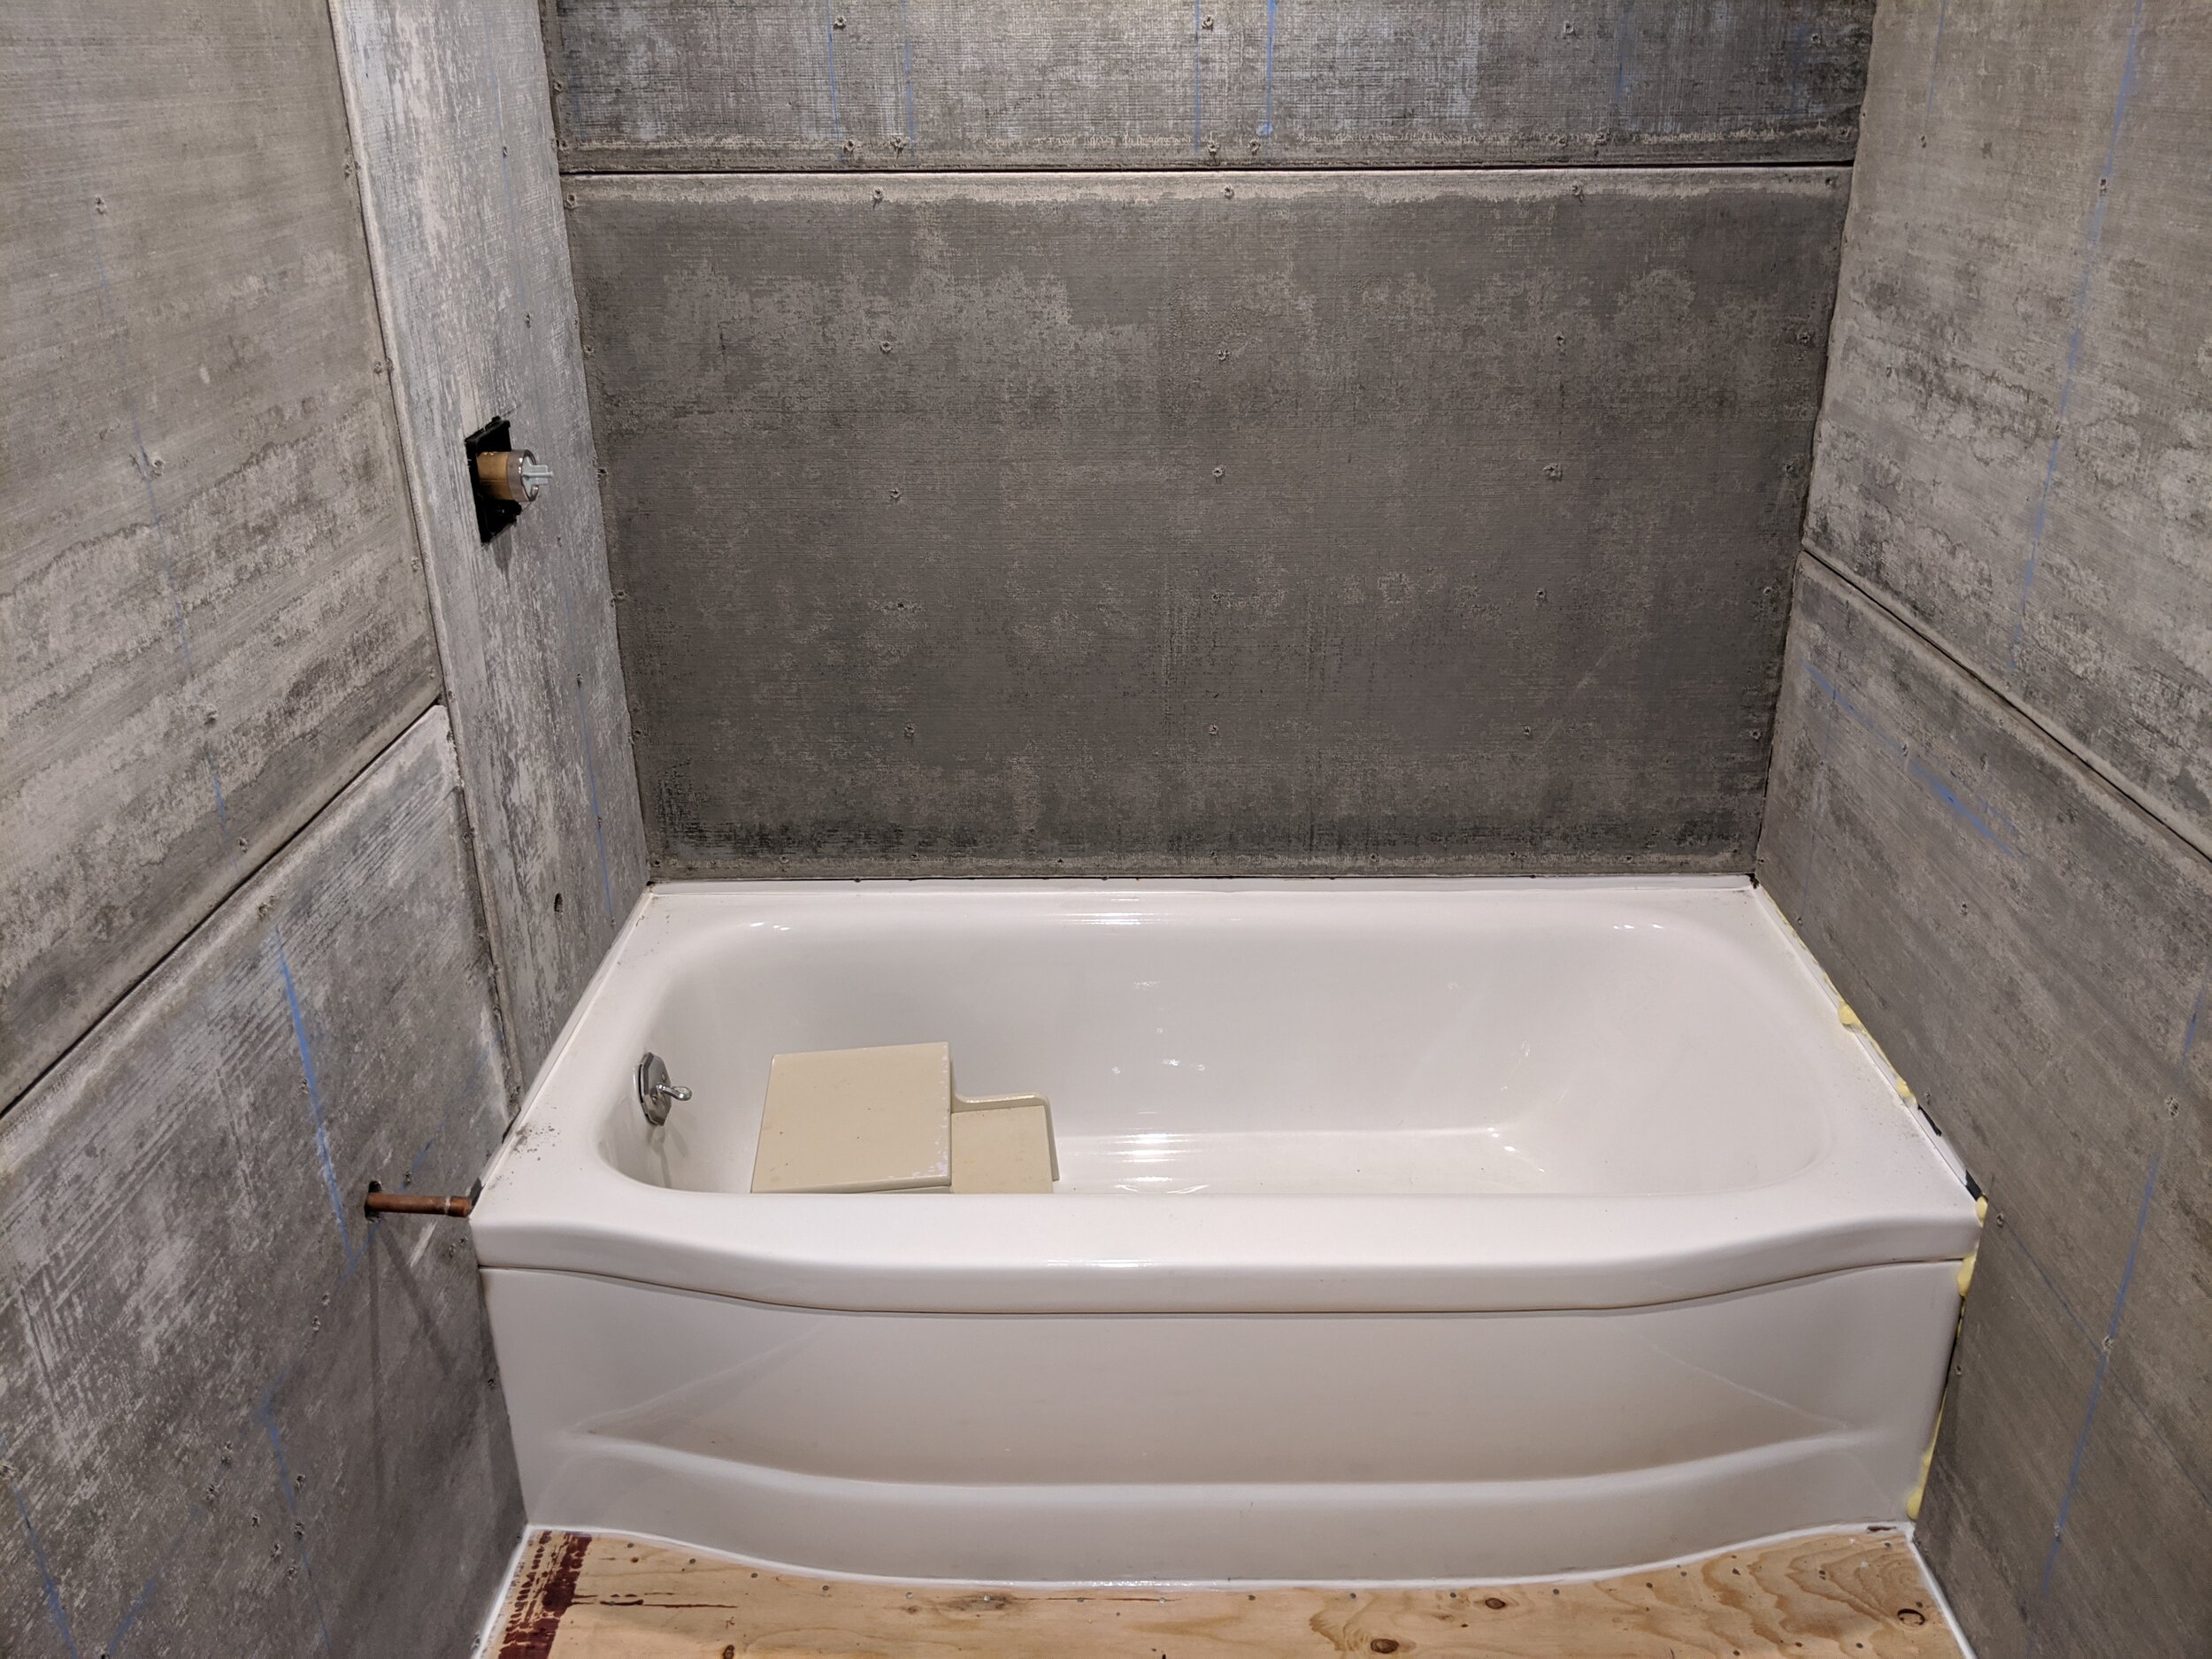
Pick your starting place — in our case, by the tub. We knew it was critical to line everything up before we started cutting or placing in order to make sure we didn’t end up with any small tile nubbins. My tiles are 12” and offset 30 degrees and 1.75”.

We used the same hole drill from the wall tile to cut out the space for the toilet, then a regular tile saw for all the edges. We stuck with our trusty tile spacers to ensure the lines were perfect.

You want to lay a level on EACH piece because your feet are more perceptive than you think, and you’ll feel it if you step between tiles that are a smidge higher or lower. Also, be careful walking or leaning/pressing too hard or you’ll crack the tile before the thinset dries.

IMG_20200510_084104.jpg

GROUT

For the grout, we used the same as the walls to create some uniformity, but obviously the sky is the limit for what you like. The nice part about this was the line between the floor and the wall is just the grout color — it’s such a beautiful clean line rather than adding a quarter-round piece or trying to have lines of one color pouring into a line of another.


bathroom-renovation-p7.png
 

Click Here to View the Full Blog Archive.      


DIY bathroom reno, phase 6 - laying hexagon tiles without losing your mind

bathroom-renovation-p6-hor.jpg

My Hubs is incredibly long-suffering with my ideas. But I almost lost the battle with hexagon tiles. I really wanted them, both as a huge fan of this trend as an avid player of Settlers of Catan. (Honestly, that might have been what convinced him.)

NOTE: Skip back if you want to see an overview (including “the before”) or previous steps we’ve already completed, or skip ahead if you’re looking for a different step in the process.

For those of you to whom it isn’t immediately apparent (like me) the problem with hexes is that they don’t form any straight lines — which means WAY more cutting than squares or rectangles. Even to lay across an imaginarily-perfectly-straight floor or wall, you’re cutting every other tile.

Our neighbor did ask if we were tiling the entire house because he was growing so accustomed to hearing the tile saw in our driveway by the time we finished…

There are likely many schools of thought on where to begin BUT we decided to do the walls before the floor.

STEP 10: TILING WALLS AND CEILING

I will talk about the floor tile in my next post, so today, we’re focusing on the walls and ceiling. We did the ceiling, as I mentioned previously, because this bathroom is caped over the shower and we know our kids will splash that part like crazy.

WHERE TO BEGIN

I selected really large 9” or 10” hex tiles, depending on how you measure. If you measure flat to flat, they’re 9” and point to point at the widest spot, they are 10”. You can just start and hope you get lucky, but I recommend picking the most focal wall and trying to get a good line for the top and sides. You don’t want to end up with like 1/2” nubbins right at your towel rod.

Also, decide if you’re laying point up or flat up. I liked the look of point-up.

92704641_214813582947040_393059545615695872_n.jpg

Please observe the amount of math I did to calculate the best starting spot across ALL my walls. I show you this because I was wrong — I did all of this and impressed myself and got my dear Hubs to trust me, only for him to get most of the way through and point out that I’d forgotten every other row slides up to build the honeycomb. We got lucky and it worked out fine, although not ideal. Don’t be like me. Remember the honeycomb. (Side note: donut cat, drawn by my 7yo son was included for your delight, top left)

The “safe zone” on my hex tiles (meaning where you can cut flat to flat, horizontally) is from appx. 2.5” to 7.75” so that you don’t end up with little triangles to fill in. Measure your tile and determine the “safe zone” so you can finagle that to hit both the top and bottom wall with flat sides. Like, if the bottom is 1” up, where does that leave the top? If it’s out of the safe zone, try 2” or 0” until you get a number where both end up flat.

CUTTING TILES

We decided a tile break would be the way to go. And we were wrong. This only worked cutting the tiles perfectly in half. Anything that adjusted for the slightly leaning walls of an old house or had to go around something and we were shattering and wasting tiles.

So, a wet tile saw became our friend, as scary and loud as it was.

Safety suggestions:

  • Ear plugs (tile saws are freakishly loud)

  • Gloves (tile is so sharp)

  • Goggles (it spits everywhere)

Working on walls, you can’t lay things out and thinset them all at once. You’ll have to cut and thinset as you go, which is irritating if — like us — you have to go up and down two flights of stairs in between.

We also used a diamond-tipped tile hole saw that goes on the drill and spins a perfect circle to go around all the pipes. In many cases, we were in the center of a tile, but it still worked if we had to split the hole between two tiles (making a semi-circle on the side of each.)

Our best trick that we started doing halfway through was cutting cardboard in the exact shape we thought we needed, based on our measurements, then placing it into the spot so we could trim/adjust as needed. It’s really hard to cut 1/8 inch off a tile but the precision of a 1/8 adjustment really elevates the work to a professional appearance. Rather than pitching tiles, get the shape and size and angle PERFECT with cardboard and then you can trace exactly onto the tile.

TILE SEPARATORS

These little plastic guys are super handy (they are green in my pictures). Look for ones specifically made for hexagons as a lot of the corner ones are made for a traditional square tile laid in rows. They keep your rows straight so nothing shifts.

THINSET

We mixed in small batches so we didn’t have to worry about the mortar dying out. The color doesn’t matter at this point since it won’t be visible. Make sure you start covering things; it’s a huge pain to scrape dried thinset off your bathtub or subfloor.

Slop it on, comb it off (leaving ridges so the thinset can smoosh flat beneath the tile without squirting out everywhere. You’ll want to be precise as the tile really grabs right away and they are hard to move. We used a combination of tile separators and tape to make sure nothing shifted.

You can see in the rough plumbing picture (that’s the outlet for the radiator) that we were able to really get precise, professional results.

EDGES

We selected a pencil line edge, but there are metal and plastic edges, as well as bullnose tiles that round off cleanly.

GROUTING

The last step is to pick your grout color (pre-mixed is best so it’s the same color throughout, as you work in batches). You need to clean everything, of course, to make sure there aren’t little scraps of thinset exposed.

Once you’re ready to begin, the grout goes in along all the seams and gets gently wiped off with a sponge. You’ll probably get most of it on the first pass, but rather than discover an air bubble or chunk of grout later, trace your eyes along each seam and look for any inconsistencies.


Next up… the floor!

 
bathroom-renovation-p6.jpg
 

Click Here to View the Full Blog Archive.      


DIY bathroom reno, phase 5 - what’s the best way to waterproof everything?

bathroom-renovation-p5-hor.jpg

A bathroom’s gonna get wet. Kids are going to splash (and I’m talking about the toilet, not just the shower). So you have to be prepared and do more than just good tile.

NOTE: Skip back if you want to see an overview (including “the before”) or previous steps we’ve already completed, or skip ahead if you’re looking for a different step in the process.

STEP 9: Waterproofing

In our case, we opted for a combination of two things: waterproofing sealant and a specially designed floor mat that is the perfect base for tile. Research your materials because there’s no point in doing all of this if your tile’s going to crack the first time you drop something. We used Schluter DITRA on the floor (the bright orange) and RedGard for the shower walls and ceiling. You can probably skip the ceiling if you don’t have a caped side like we do, but it does offer more protection when your kids are shaking their wet hair around pretending to be a (1) lion (2) rock star (3) lion rock star or something else. My son also developed a game of being a whale which basically means he gets a ton of water in his mouth and sprays it against the ceiling as hard as he can. I say this (mostly) to further illustrate the importance of waterproofing.

MVIMG_20200410_204125.jpg

The waterproofing membrane for the floor gets sealed together and mudded just like drywall or concrete board (wait, I’m STILL not done with mudding?) on any pieces that are edge to edge as well as — most importantly — against the wall and tub.

RedGard smells REALLY bad to use, so let me emphasize the importance of ventilation. Even in a mask, Hubs had to take like 3 breaks just to do the four areas that were in our shower. It’s intense stuff. Don’t be irresponsible. Read the labels and follow the instructions. ANYWAY, the funny part about RedGard is you can see it dries a deep red, but it goes on like SUPER neon fuchsia, the color your Lisa Frank Trapper Keeper use to be. I tried to rile up my sons by telling them this super-bright-pink was the color we picked, thinking they’d hate it, but they were excited.

At this point, you are ready to enter the tile zone. Take a deep breath.

 
bathroom-renovation-p5.jpg
 

Click Here to View the Full Blog Archive.      


diy bathroom reno, phase 4 - concrete board and drywall

bathroom-renovation-p4-hor.jpg

Finally, things are starting to look like a room again! Concrete board is brittle nonsense: hard to cut, easy to accidentally snap, difficult to write lines on… ugh. Drywall, on the other hand, is generally lovely. But you need both to really do it right.

NOTE: Skip back if you want to see an overview (including “the before”) or previous steps we’ve already completed, or skip ahead if you’re looking for a different step in the process.

Concrete board is best for its waterproof magical power, and great for tiling over over in a shower.

Drywall is best for its power to be super-smooth, so good for being painted in the areas that aren’t going to be regularly bombarded by water.

Hanging the walls means cutting out a lot of little holes. Holes for the plumbing pipes, holes for the electrical outlets, holes for the lights. It’s a lot of measuring and sawing!

We have, as you’ve likely noticed from my pictures, an oddly shaped room. The upstairs is caped in this portion, and there’s a skylight. So we had a LOT of cutting to do. After everything is cut (and cut again, then trimmed, then doesn’t fit because you’re holding it upside down, then FINALLY gets screwed in, you’re ready to ‘mud’ — which really just means taping and putting special mortar and drywall joint compound on the seams.

STEP 8: Concrete board and drywall

Once everything is cut and screwed in place, you tape and mud, sand, tape and mud, sand, tape and mud, sand, I think until you grow grey hair. Just kidding — two coats will likely do it. You want to be sure you cover all the screw holes. I don’t want to call Hubs out, but he thought some of the screws were going to be hidden until window and door trim and didn’t mud them, then had to get all that stuff out again when he was at the painting step. (Hey, if it’s his only mistake, surely he’d want me to share it so you can do things perfectly.)

You can also see we’re already using the new lights (see the electrical phase, previous step) to guide our work because you just can’t beat those snap-in wafer lights.

I think this panorama Hubs took is ridiculous, so of course I’m posting it. It’s like a paper doll house that hasn’t been built yet. This is post-hanging, pre-mudding obviously. You can see the blinds on the skylight in the middle, as well as the beautiful new subfloor he built. (See the earlier unsexy phase 2 for that.)

You can also see the large hole for the exhaust fan in the ceiling, which was wired in the electrical phase, and the square hole for the AC vent.

At this point, you can see into the hallway from the shower (not great for the modest!). This is because we still need access to the plumbing for when the fixtures get put in. We actually ended up adding a hallway access panel to make sure we could get into the shower plumbing in the future, should that ever be necessary.

You can also see the small white stool I bought for my youngest to be able to reach the sink to brush his teeth (in the tub) — the very same stool that has since been thrown away because Hubs broke it by using it like a construction ladder.

 
bathroom-renovation-p4.jpg
 

Click Here to View the Full Blog Archive.      


DIY bathroom reno, phase 3 - electrical and rough plumbing

bathroom-renovation-p3-hor.jpg

This is the step you shouldn’t tackle unless you know what you’re doing. If you have that friend who “could definitely do that” — RUN RUN RUN far away. Get a professional. Electricity is a heartless bitch, and you don’t want to tell the story of the time you accidentally flooded your upstairs with sewer water.

NOTE: Skip back if you want to see an overview (including “the before”) , phase 1 which is doing demolition right, phase 2 which is the unsexy insulation and floor demo, or skip ahead if you’re looking for a different step in the process.

STEP 6: ELECTRICAL

Because I want you to take me seriously and get a professional, mostly what I’m going to talk about here is planning ahead and lighting choices.

As I said before, we took this opportunity to hardwire in a smoke detector. (It has a battery backup in case of a power failure.) We also thought ahead about some additional new features we might like. For example, if we ever decide to add a lighted mirror, that wire is already strung inside the wall. Additionally, Hubs decided he wanted lights in the closet, so we added the capability for that.

For our lights, we knew we wanted more of them. We picked three 4” round waterproof white wafer lights. They work with a dimmer and can be controlled via our home devices (like Alexa and Google Home). We put them centered down the middle of the room horizontally, with one right in the shower. I have to say, with the project finished now, I’m delighted with these tiny lights. They are nice and bright, a lovely shade of soft white, and don’t buzz. Plus, they were easy to install since they clip right into the drywall or concrete board without having to be anchored to the ceiling above. See picture of the hole in the shower above Hubs drilling something.

We also installed a powerful new exhaust fan to help keep everything dry in the new room we were spending so much time building.

STEP 7: ROUGH PLUMBING

This is the part where the professional you’ve hired checks that everything is up to code. Then, the professional you’ve hired gets everything set for your new fixtures.

We have the standard things you’d expect to find in a bathroom: a toilet, a sink, a shower, and a tub. However, we also added something Hubs was delighted to try: a radiator that’s a heated towel rack. Our kids will be such snobs with their warm towels!

Our bathroom doesn’t have a huge floor area, so the giant heater was eating into that space. The solution was a dual-purpose towel rack and radiator.

(To see the radiator, skip ahead to the radiator install step.)

It heats the room in the winter but you can also dry/warm your towels on them. So we didn’t need to add a separate towel rack for the kids to not use while they instead opted to leave their wet towels heaped on the floor. (Hey, managing expectations is a critical part of motherhood.)

 
bathroom-renovation-p3.jpg
 

Click Here to View the Full Blog Archive.      


diy bathroom reno, phase 2 - the unsexy steps of insulation and floor demolition

bathroom-renovation-p2-hor.jpg

These are not the sexy, appealing steps of a home renovation, but they are the things that can set your work on the level of ‘great new bathroom’ instead of ‘oh wow, you did this yourself.’ Trust me, there are orders of magnitude in the difference these small steps can make. DIY-ers want to skip to the fun part of picking out paint and laying out tile, but taking the time early on makes everything 100% better.

NOTE: Skip back if you want to see an overview (including “the before”) , phase 1 which is doing demolition right, or skip ahead if you’re looking for a different step in the process.

Be safe.

Don’t mess with insulation without goggles, gloves, and a mask. Read the product labels and follow the instructions. They are there for your protection. Also, make sure you read the labels so you know which way the paper on the roll-out insulation should be facing. Also, make sure you fluff that stuff up a bit before you install since it comes heavily compressed for easier transport.

Cutting insulation can be a pain. We used a combination of an electric knife, heavy duty scissors, a serrated knife, and an exacto blade. Be careful using sharp stuff, as well as insulation, and don’t leave little pieces laying around for kids or pets to find.

STEP 4: INSULATION

Insulation is boring, but if you’re serious about both comfort and money savings, you gotta do it right. Install the correct type of insulation for each wall or ceiling, based on its position in your home and your climate. If you don’t know, use the professionals at a good home store to help. You will thank me when it’s winter and your bathroom is still warm when you step out of the shower! (And you aren’t paying out the wazoo to run your heat as the warmth escapes through the walls and ceiling.)

In our case, we took the opportunity to fix some attic insulation that was a problem, as well as wire in a smoke detector so we didn’t have to worry about battery beeps. (Yes, it has a battery backup to still function in an outage.) More about electrical later.

For our project, we installed the classic roll-out pink insulation for the walls and ceiling, then stiff styro for some of the walls with less horizontal depth.

STEP 5: DEMO THE FLOOR

Why is this listed as a separate step? Good question. Two reasons: as previously stated, I hate the squeaky squeaks. No thank you to creaking when my kids walk around! So a new sub-floor was helpful in adding the sound of silence. But also, we discovered water damage we wouldn’t have seen if we’d just decided to add a layer (on top of the THREE that were already there). So we’re glad we took the time to do it right. This also helped us hugely at the later step of tiling because the sub-floor was all new, it was level and flat. Laying attractive tile on an uneven surface is essentially impossible.

Final note: if you pull the toilet at this stage like we did, PLUG THE PIPE with a wadded towel. That stank will not leave if you let it waft up. (I don’t speak from experience, because the Hubs thinks ahead.)

 
bathroom-renovation-p2.jpg
 

Click Here to View the Full Blog Archive.